2748
2748
Geofencing works like setting up a virtual boundary around a real place using GPS or RFID technology. Picture it as establishing an invisible boundary encircling your residence. Each time an individual or object traverses this boundary, it initiates a pre-defined action or alerts you accordingly. In the realm of digital applications, this boundary is demarcated by GPS coordinates, specifying the area's limits. Consequently, when someone enters or exits this delineated area, designated actions can seamlessly activate through your Z-Box device. Geofencing emerges as a potent tool harnessing location-based technology to automate tasks, furnish pertinent information, and fortify safety and security across diverse settings.
You can use geofencing in a variety of ways! Anytime you (and your smartphone, which is the trigger) leave a certain radius around your home, all the lights automatically turn off. Conversely, when you approach your home, the lights can turn on automatically, providing a well-lit environment upon your arrival. Or, integrate with your smart thermostat so that when you leave the geofenced area around your home, the thermostat adjusts to an energy-saving mode.
These are just a few examples of how geofencing can enhance the functionality and convenience of a smart home by automating tasks based on your location.
Switch between Home and Away profiles based on the location of your smartphone.
- If you need help with setting up the profiles refer to the Creating and Managing Profiles article for detailed steps on how to set up and manage profiles.
- To make sure geofencing is enabled on your phone you can check our How to Set-Up Geofencing on Z-Box Hub article.
If you want to change the profile based on a single user location, you can simply create a single block scene for each profile. We've included instructions for this situation in Scenario 1 below, which illustrates how to change the profile from Home to Away and set the block scene.
Changing the profile from Home to Away based on multiple devices and users entails creating variables and scenes. We've illustrated how to accomplish this in Scenario 2 below, which shows you how to define the necessary variables and use them in your scenes.
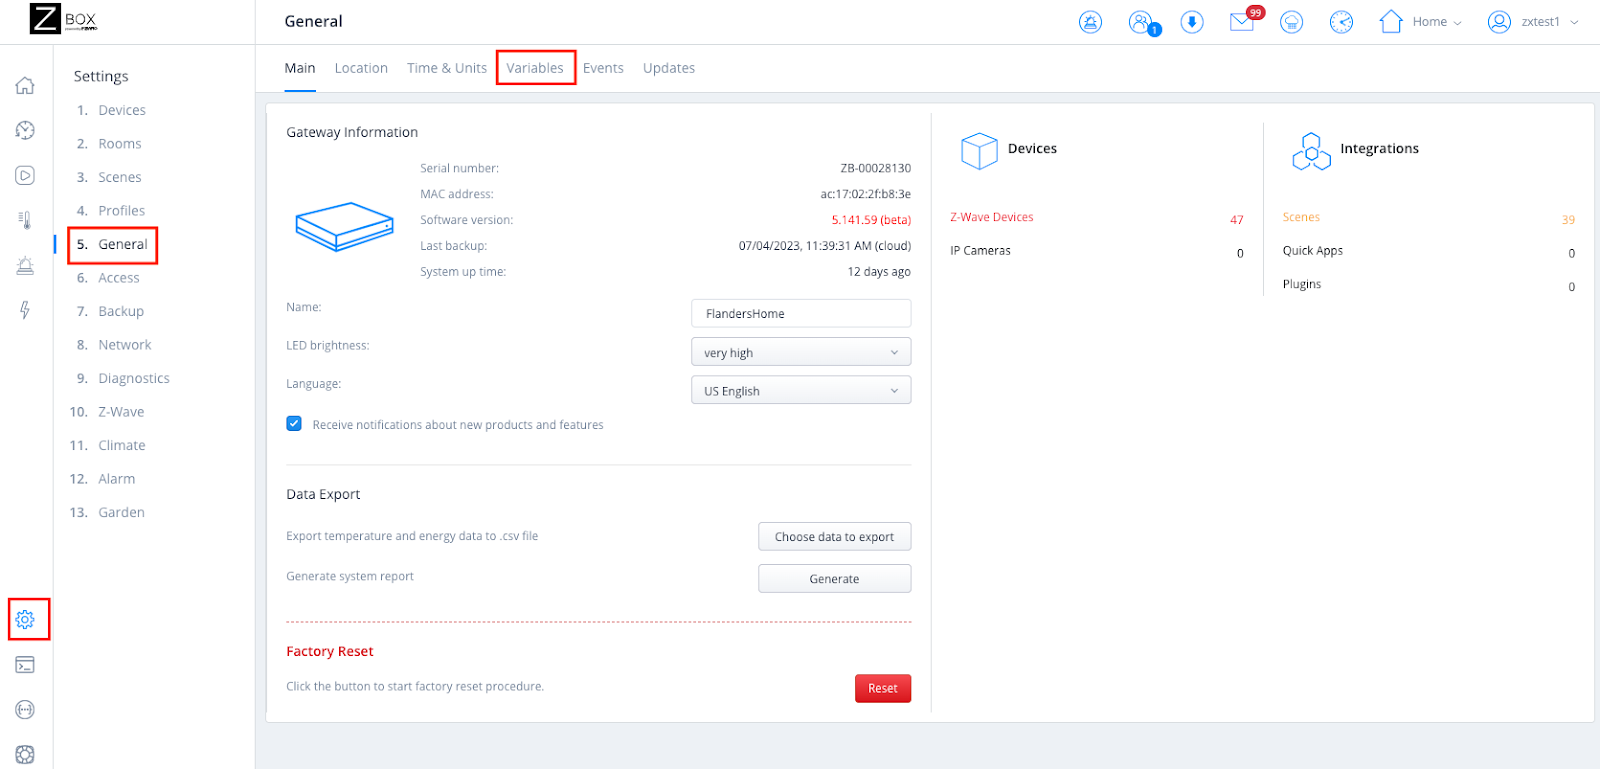
1. First, you will have to define two variables and assign the values for each user. From the sidebar navigation menu of the Z-Box web interface, go to Settings > General > Variables.
2. Click on Add Variable and select Enumerated Variable.

3. Define the first variable by providing a name and all possible variable values. You will need to create 2 variables: one for User1 and one for User2. Each variable will have two possible values: Home and Away. Once you create the first variable, repeat steps 2 and 3 to create a variable for the second user.

4. Next, you will have to create 4 scenes to assign a trigger for each variable value defined above. Navigate to Settings > Scene > Add Scene > Block Scene. Use User/GPS location as the Trigger and Variables as the action to create 4 scenes accordingly. Note: you can hide those 4 scenes so they are removed from the scene list. You can do that from the scene detail view by checking the Scene hidden box.
The scene below shows that when User1 leaves the house, set User1's variable status to Away:

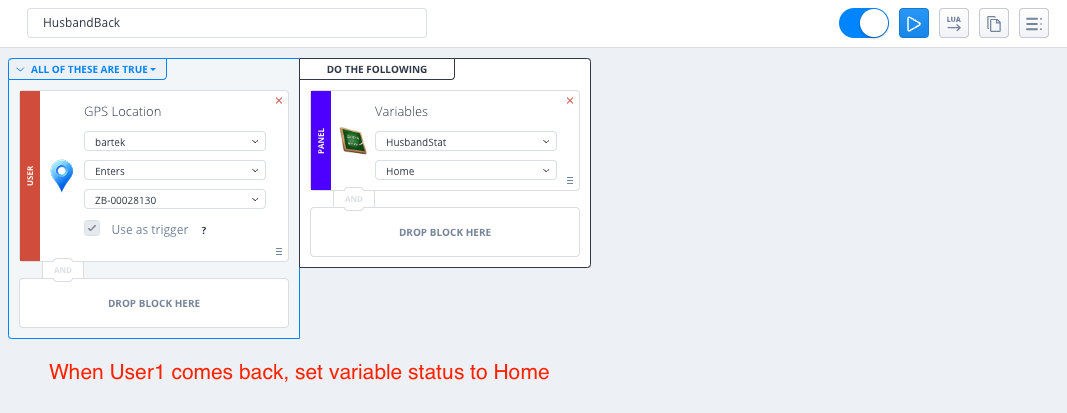
When User1 comes back to the house, set User1's variable status to Home:
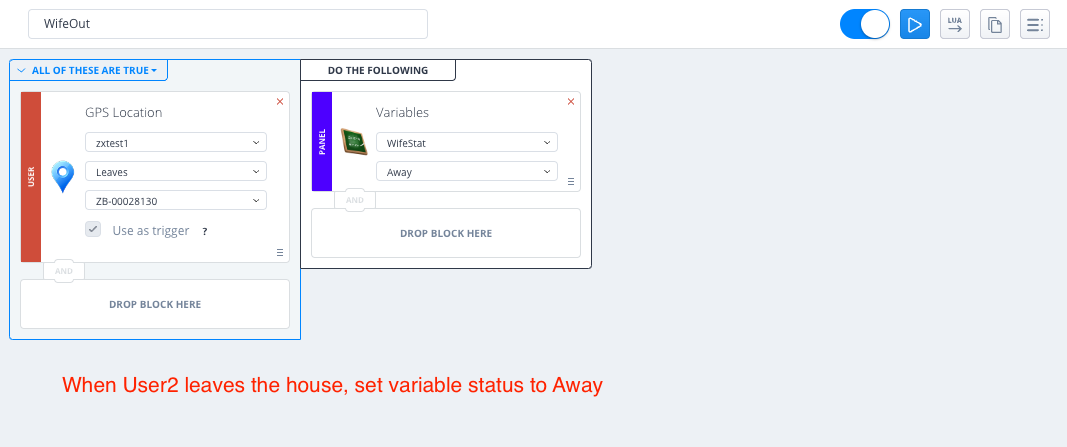
When User2 leaves the house, set User2’s variable status to Away:
When User2 comes back to the house, set User2’s variable status to Home:

5. Now you can proceed to define the actual scenes. Below is a sample combination of the scenes.
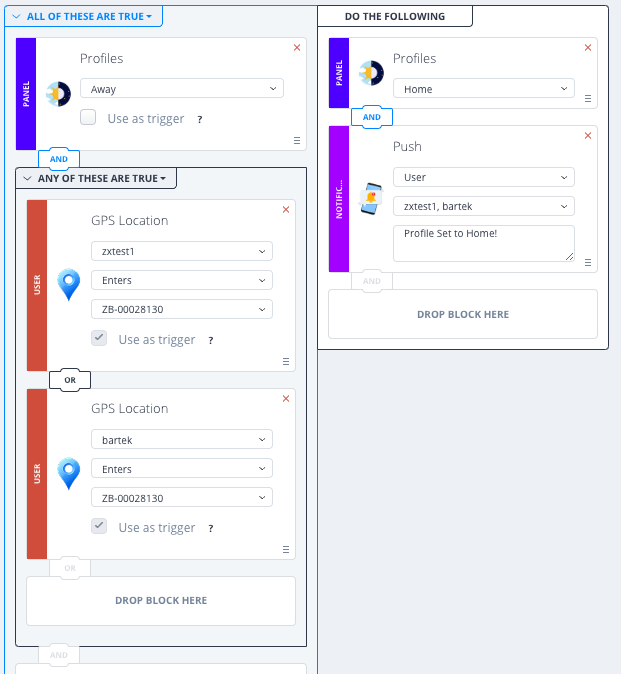
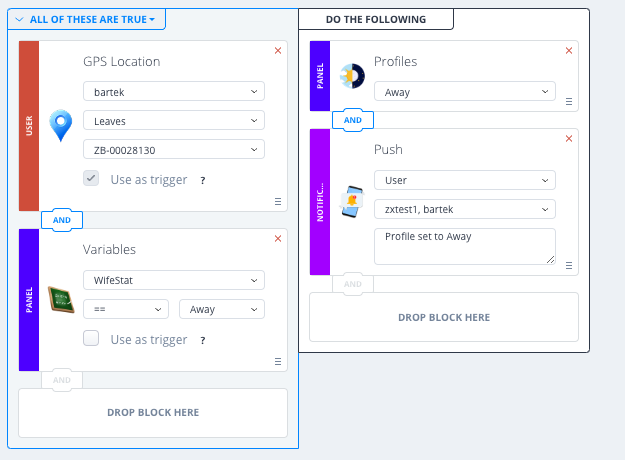
Scene 1: When User1 leaves and the User2 variable is set to Away, change the profile to Away and send a push notification to both users.
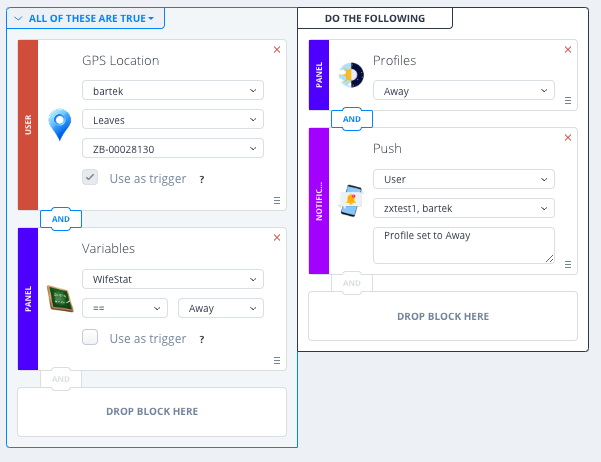
Scene 2: When User2 leaves and User1 variable is set to Away, change the profile to Away and send a push notification to both users.
Scene 3: When the profile is set to Away and either one of the users returns home, change the profile to Home.