
 2366
2366
Geofencing is like drawing a virtual fence around a real-world area using technology like GPS or RFID. Imagine stretching a border around your house, and every time someone or something crosses that border, it triggers an action or notification. In the digital world, that border is drawn using GPS coordinates to create the boundaries. So, when someone enters or leaves a specific area defined by those coordinates, certain actions can be triggered automatically via your Z-Box. Overall, geofencing is a powerful tool that leverages location-based technology to automate actions, provide relevant information, and enhance safety and security in various contexts.
Geofencing can be used to automate tasks at home. For instance, when you're approaching your house, your smart thermostat can adjust the temperature to your preferred setting, or your smart lights can turn on automatically as you near your home.
Through geofencing, you can establish "triggers," causing certain actions to occur when a device enters or exits the predetermined parameter.
Before you can enable geofencing on your Z-Box system you will need:
- Z-Box Hub App (Geofencing is only available for mobile devices)
- iPhone or iPad (iOS 10.0 or later) or Android device (Android 4.4 or later)
- Configured Home Location
To review your location configuration, from the sidebar navigation menu of the Z-Box web interface, go to the Settings/General/Location menu and confirm that the Address field is correct. The default Radius for Geofencing is 492 feet (150 meters). You can adjust your location if necessary.

To Enable geofencing on an iPhone (iOS) device:
1. In the Z-Box Hub mobile application navigate to the Application Settings menu.
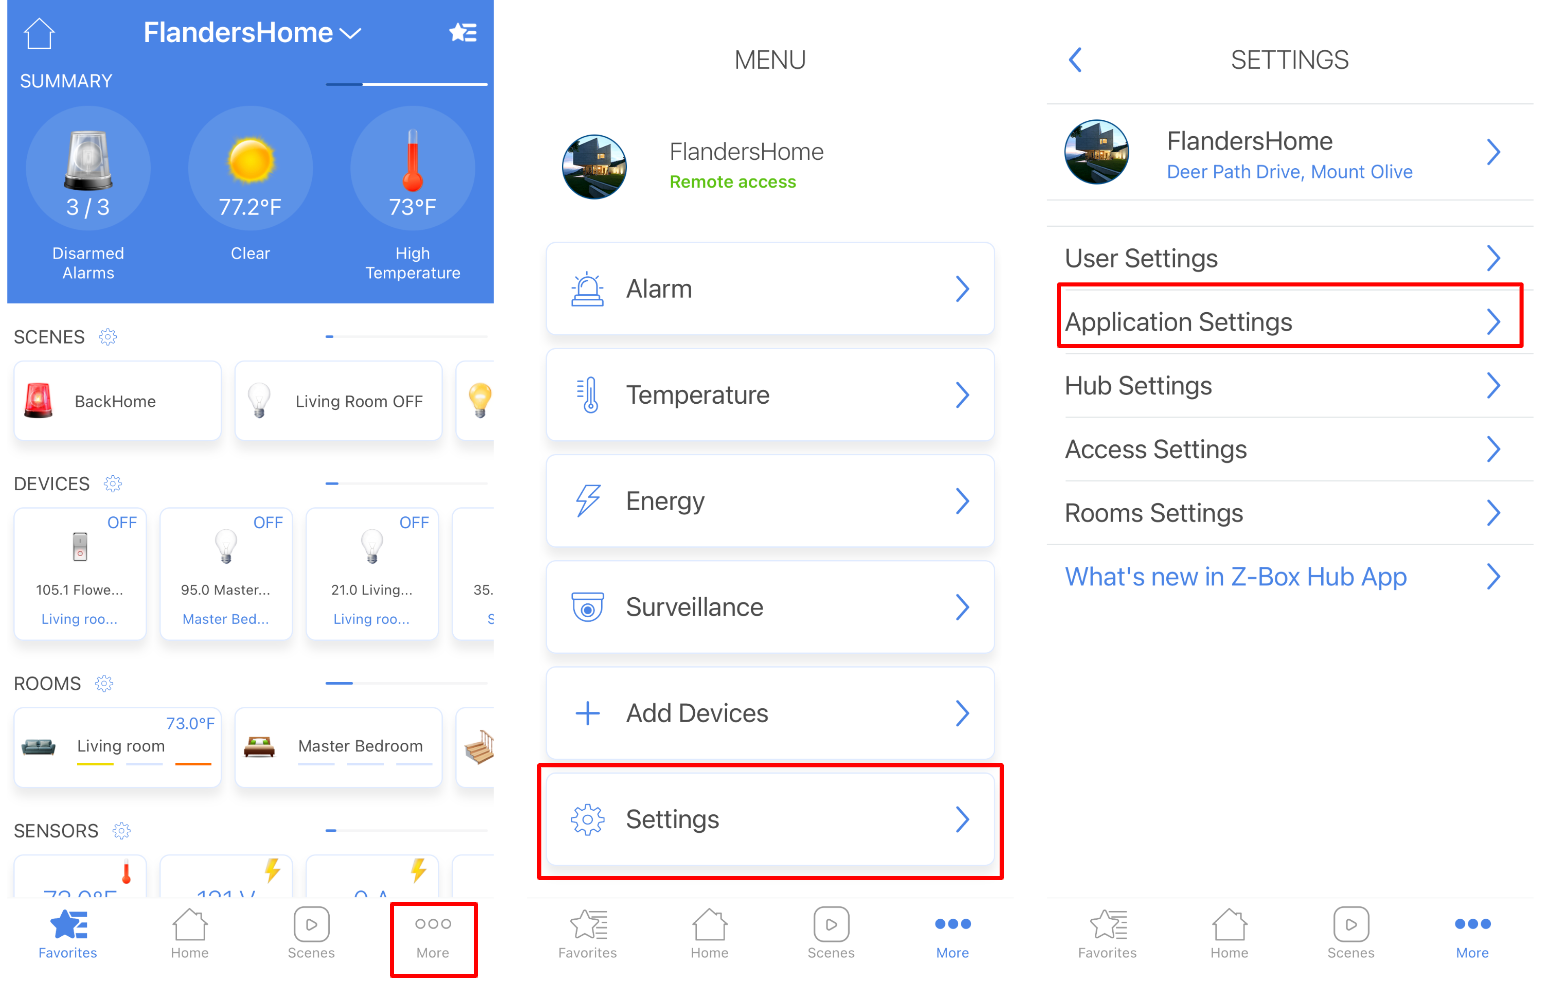
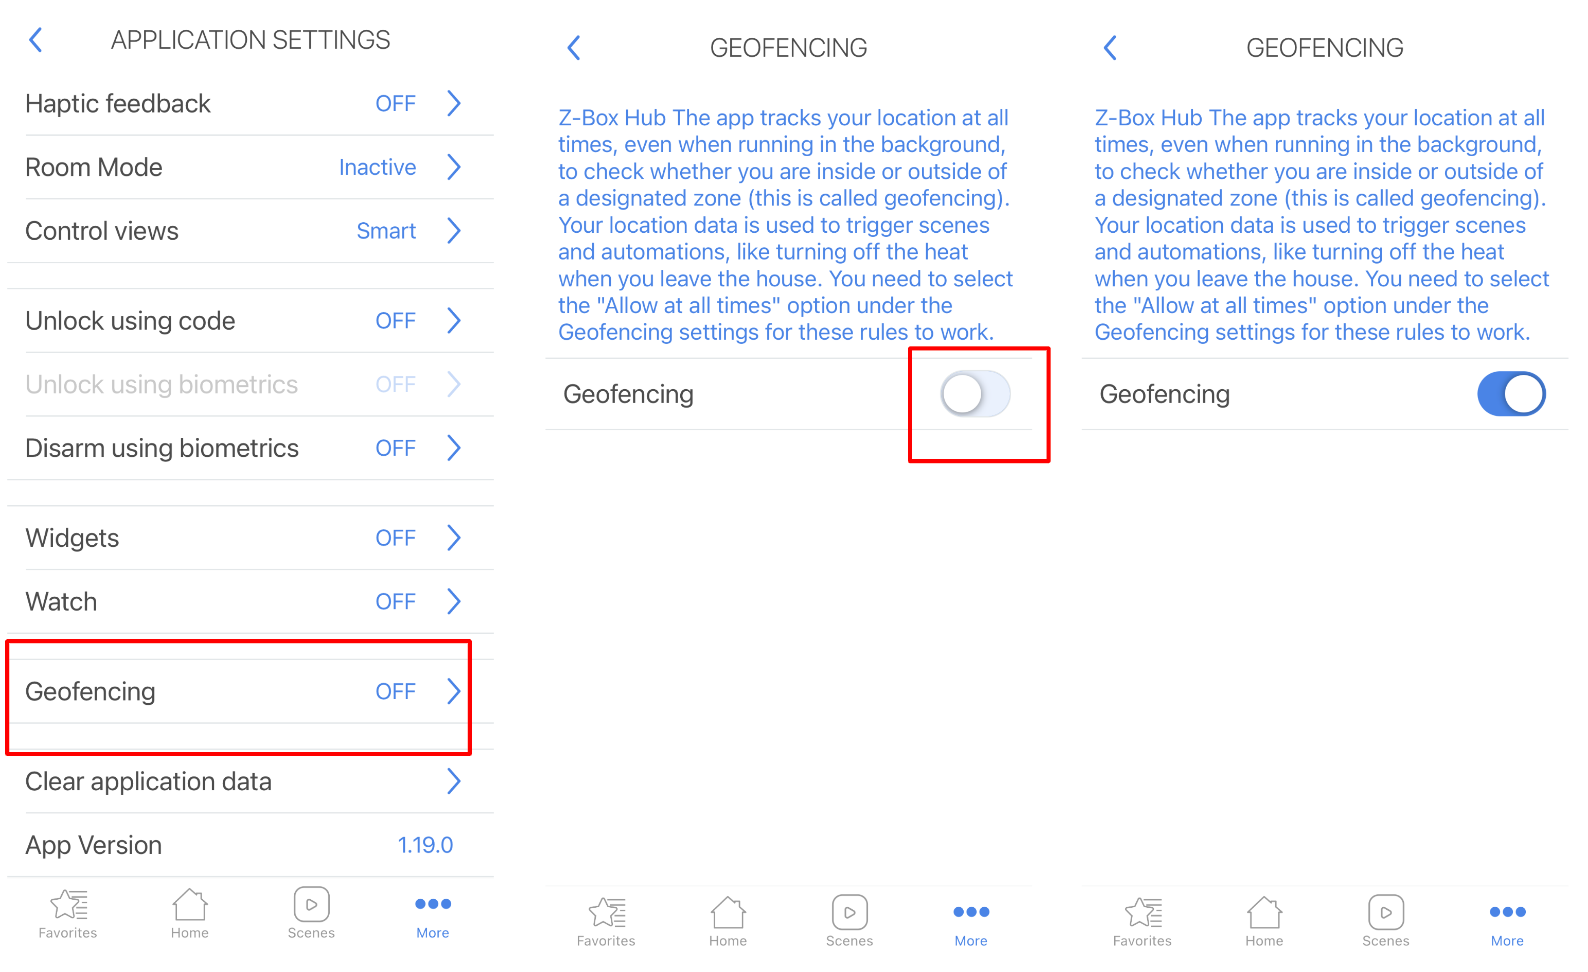
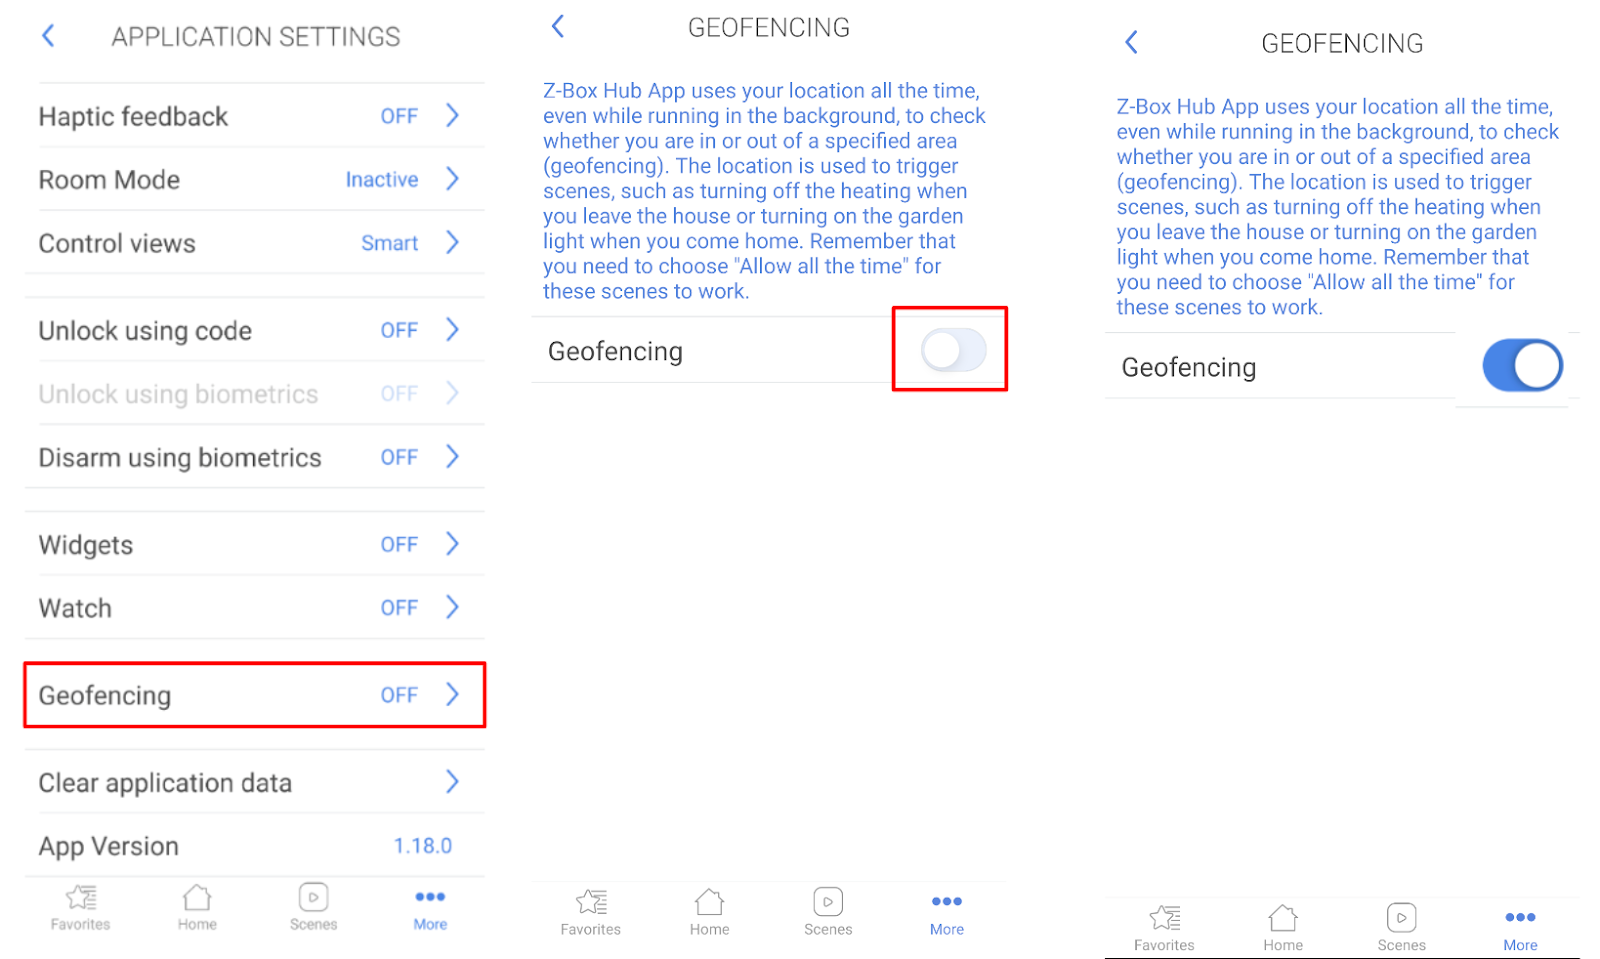
2. Scroll down and click on the Geofencing submenu and change the toggle to the ON position.
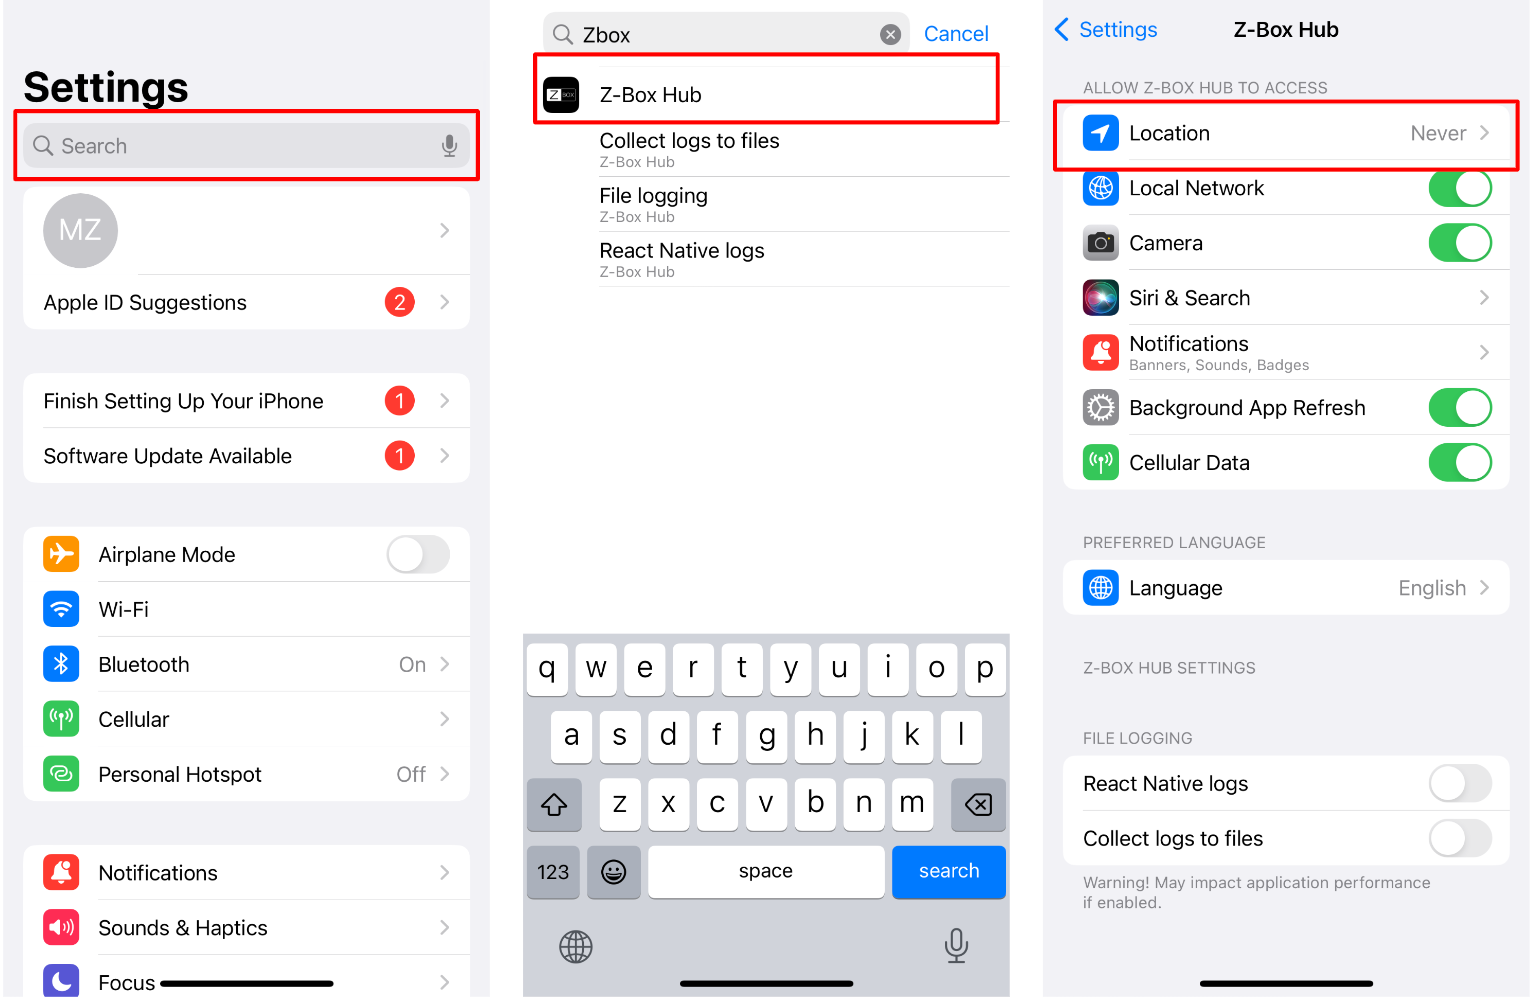
3. Next, go to the iPhone’s Settings, scroll down or search for Z-Box Hub. Click on Location.
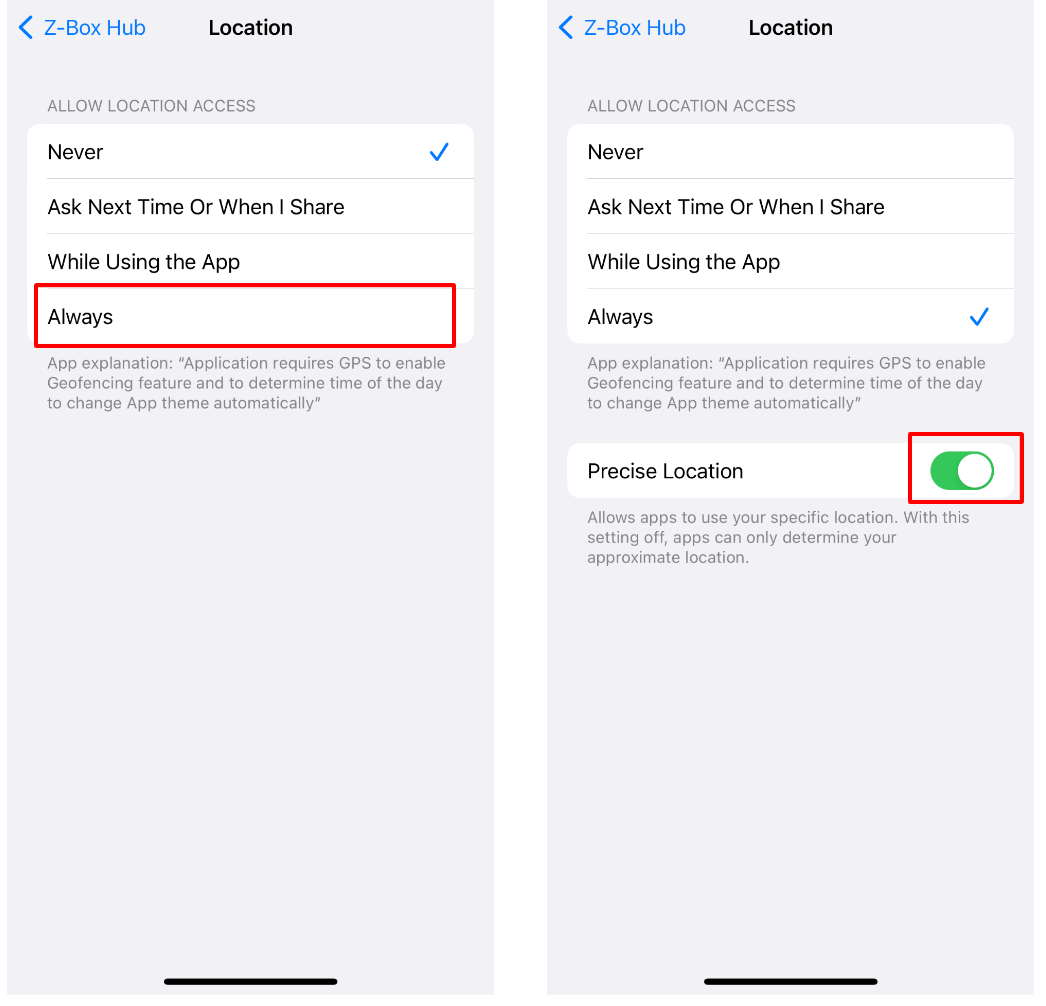
4. Change the location to Always and make sure that the Precise Location toggle is ON.
5. Your iOS device is now configured to be used with Geofencing. You can now use Geofencing as a trigger in your scenes.
To Enable geofencing on an Android device:
1. In the Z-Box Hub mobile application navigate to the Application Settings menu:
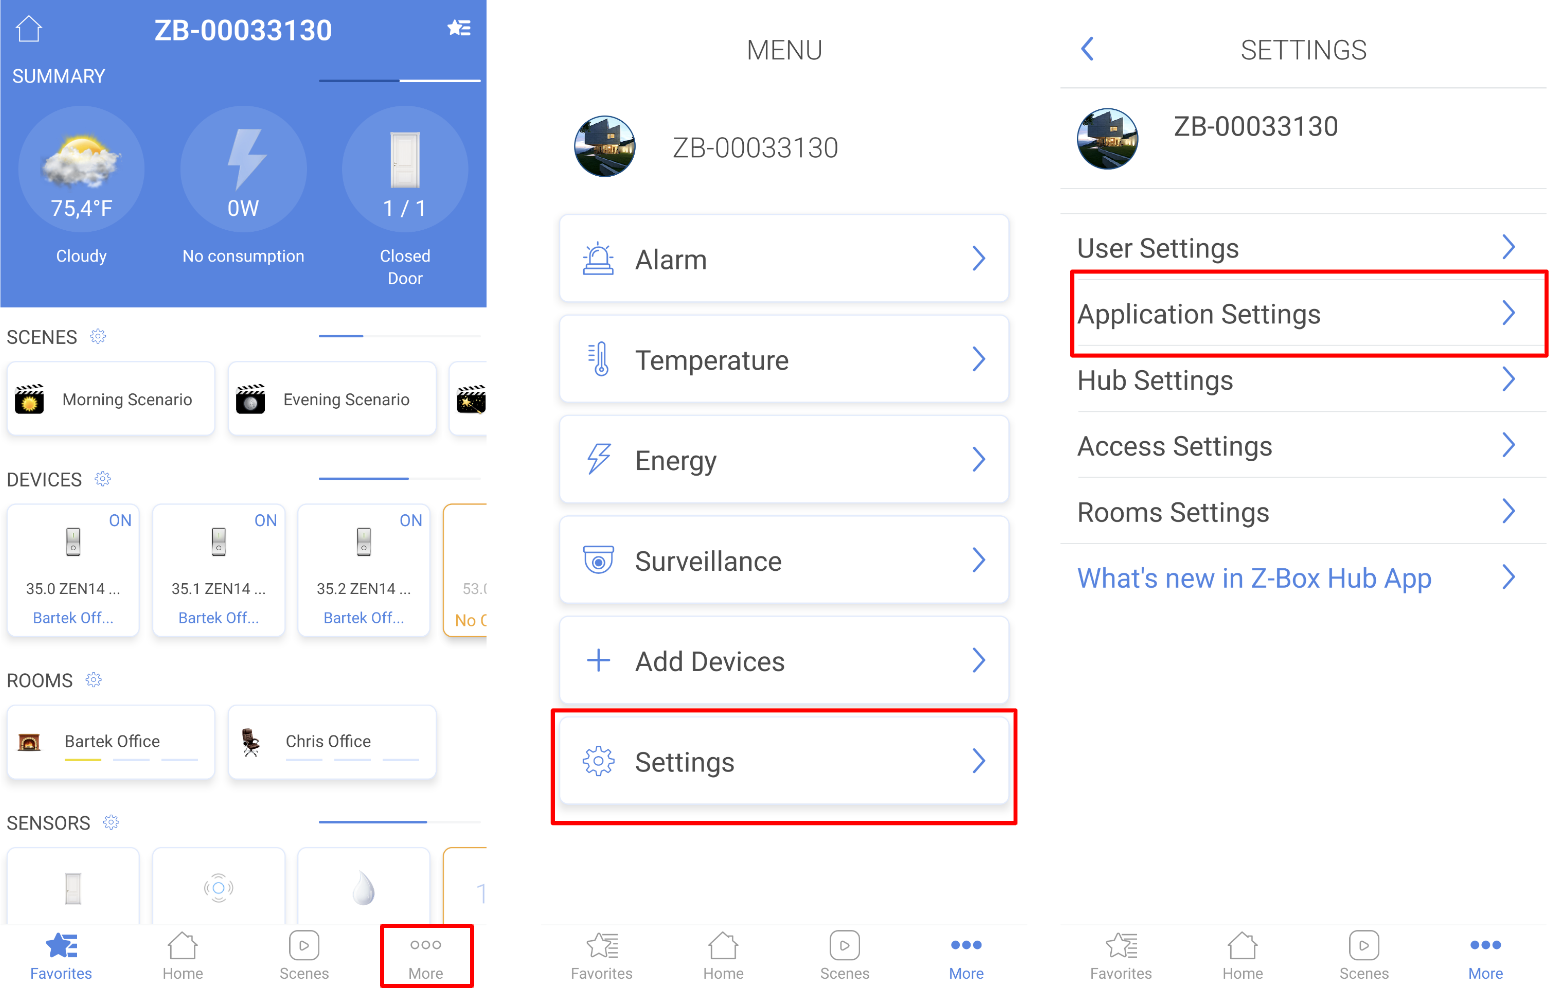
2. Scroll down and click on the Geofencing submenu and change the toggle to the ON position.
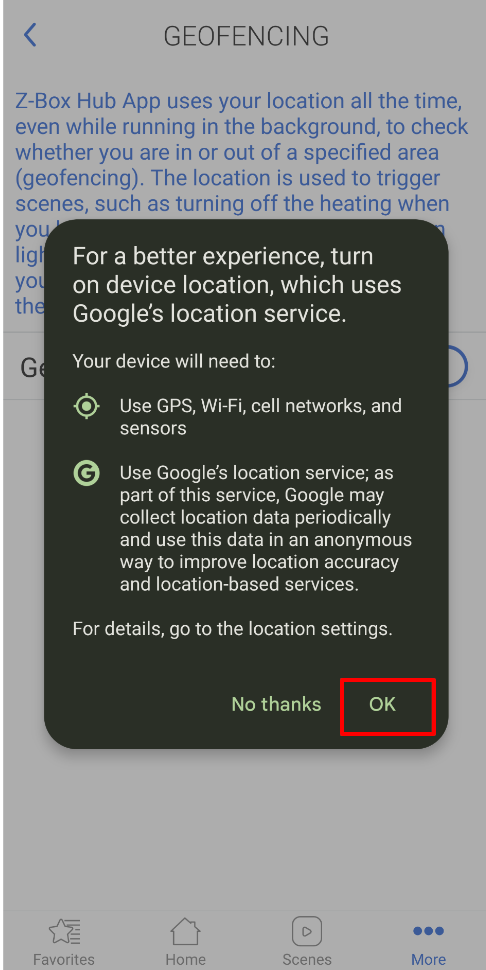
3. The device will ask for permission to access location data at all times; for geofencing to work this must be enabled. Click OK.
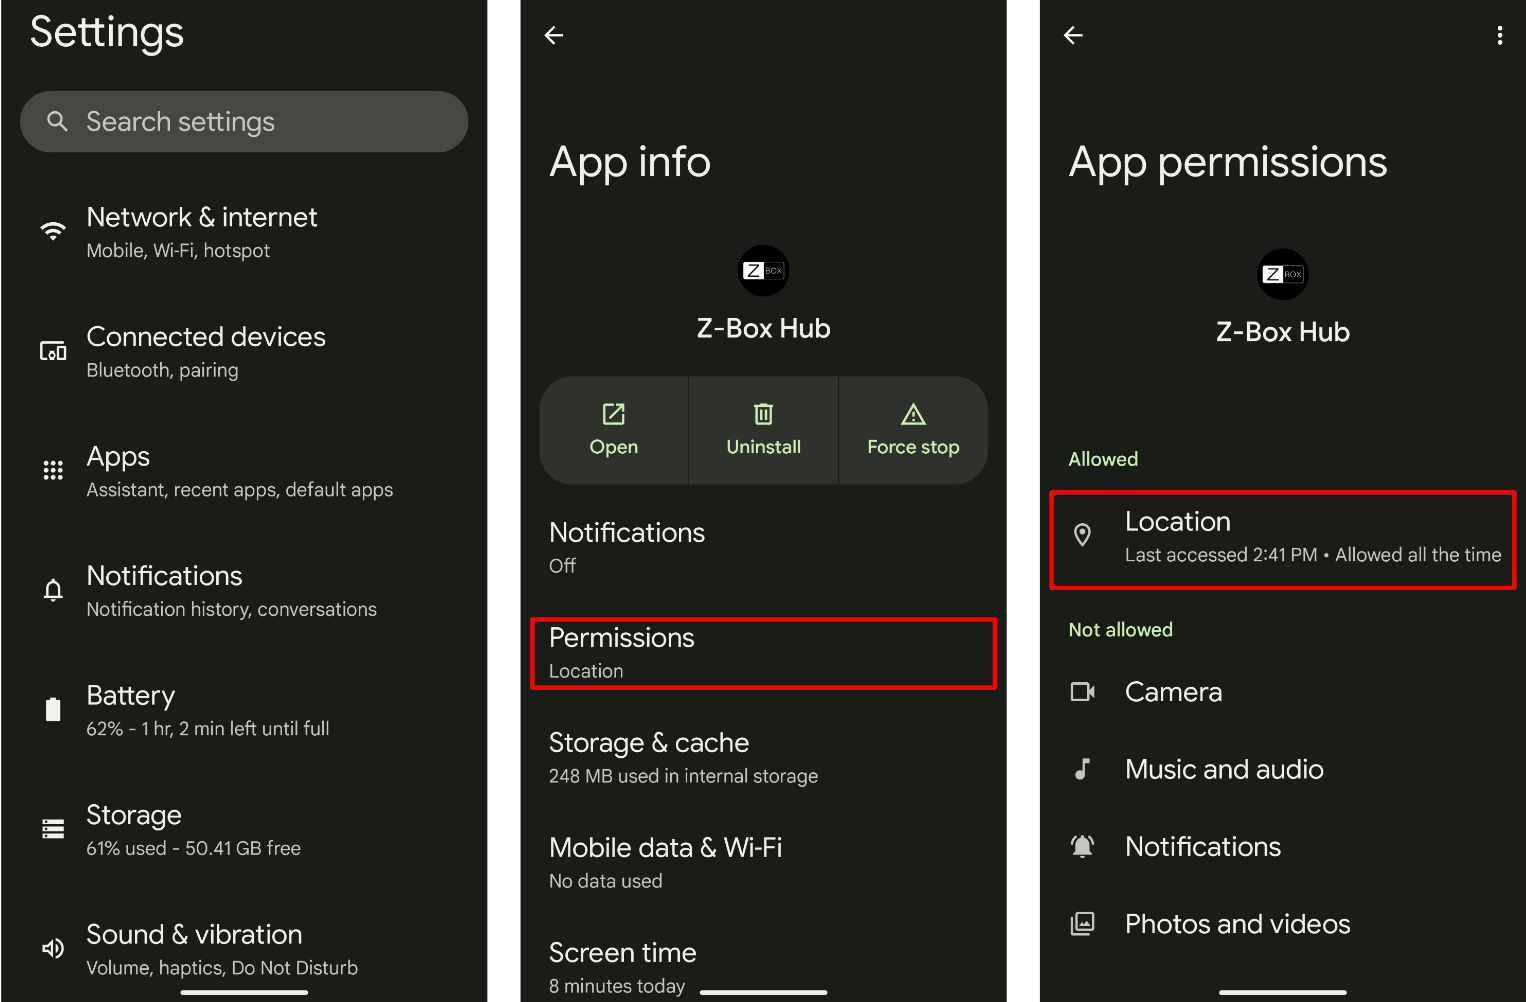
4. To check if constant location data access is enabled navigate to phone Settings > Apps > Z-Box Hub App > Permissions. If Location is not set to allow all the time, select Location and change it to Allow all the time.
5. Your Android device is now configured to be used with geofencing. You can now use geofencing as a trigger in your scenes.
You can check out our instructions in the How to Use Geofencing in Automations on Z-Box article for easy to follow illustrations on settings scenes using geofencing.

