
 7555
7555
The Z-Box Hub supports OTA (over-the-air) firmware updates to help you maintain your Z-Wave devices.
In case you’re missing any functionality on your Z-Wave device or it’s not behaving correctly and you identified a fix in the device change log, you can update your device. It’s recommended to perform over-the-air updates only if absolutely necessary. Please note that any updates are at your own risk and if the wrong file is applied to a device, it can be easily bricked. Devices damaged during a firmware update, are not covered under warranty.
The only files that should be loaded to Zooz devices are those provided directly by Zooz; unauthorized firmware applications can brick the device. We provide the most up-to-date firmware files for you on our website. Please visit the Zooz OTA Firmware Files article for more details and to access the files for all Zooz devices.
Remember: All updates are at your own risk. Products bricked during an update are not eligible for warranty service, replacement, or return.
Before proceeding with the update:
- Remember to unzip the file after downloading it before using it to update your device. 500 series device files will use the .otz or .hex format while 700 series device files will use the .gbl format.
- Always double-check that you're applying the correct firmware file to the right model and version of your Zooz device. Loading the wrong version to your device may deem it unusable.
- You will need to reconfigure the device after the firmware update. After reconfiguration, device ID might change. Device name will be changed as a part of reconfiguration as well. More details in the article below.
- If you are updating a battery-powered device, make sure that the device's battery life is at least 25%. A firmware upgrade might fail if the device battery is not sufficient.
- Battery powered devices will need to be kept awake during the firmware update process. You can verify the manual wake up process for each device in the device manual as well as in Zooz Knowledge Base documentation.
Troubleshooting Steps:
- If you notice an error about the wrong fragment size, please change the fragment size to 20 before attempting the update again.
- If your device doesn't function correctly after the update is complete, please exclude it from your hub, factory reset the device, and then re-include it.
VERIFY THE DEVICE CURRENT HARDWARE AND FIRMWARE VERSION PRIOR TO UPDATING:
To check the current version of a device's firmware (if you already know the firmware version on your device, jump to OTA update using Z-Box hub):
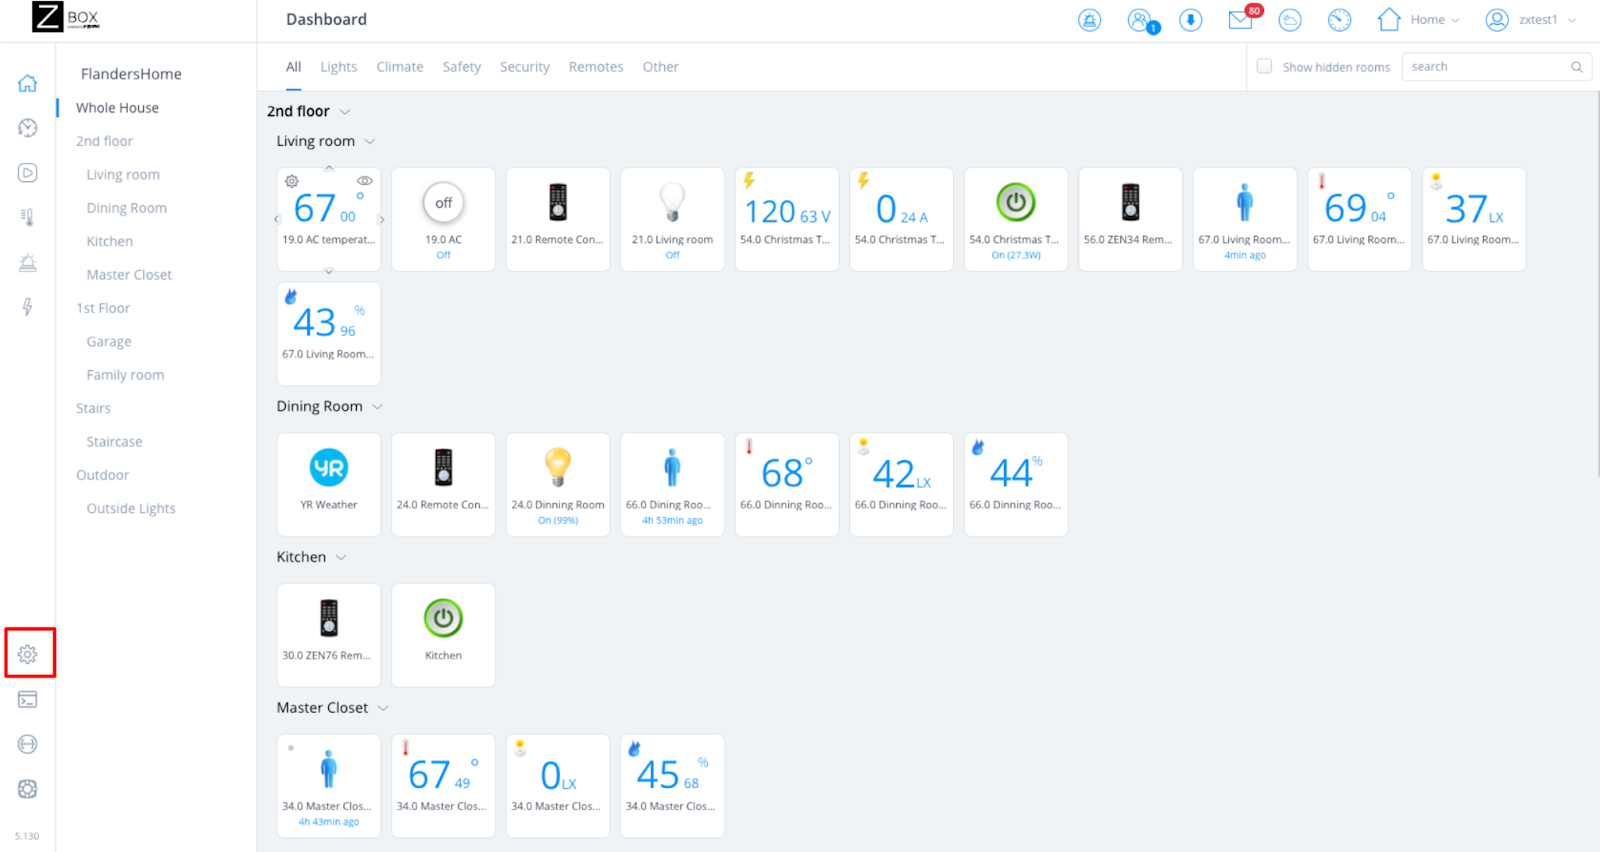
1. From the sidebar navigation menu of the Z-Box web interface, go to Settings by clicking on the gear icon.
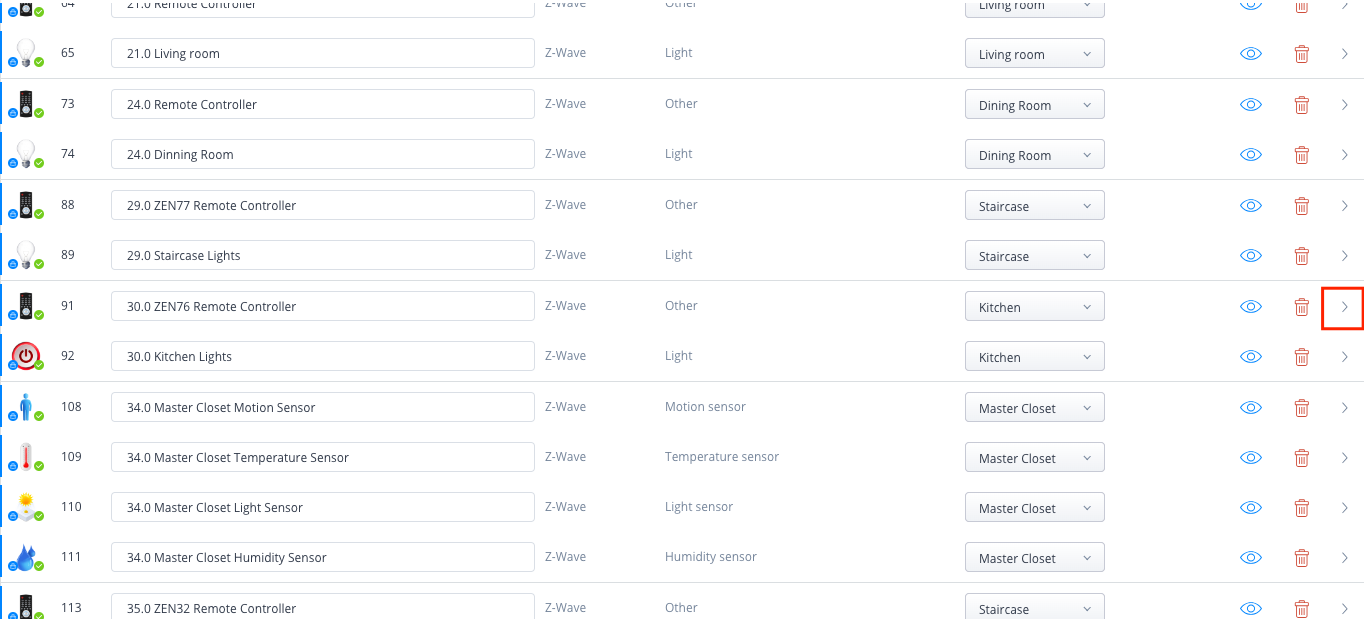
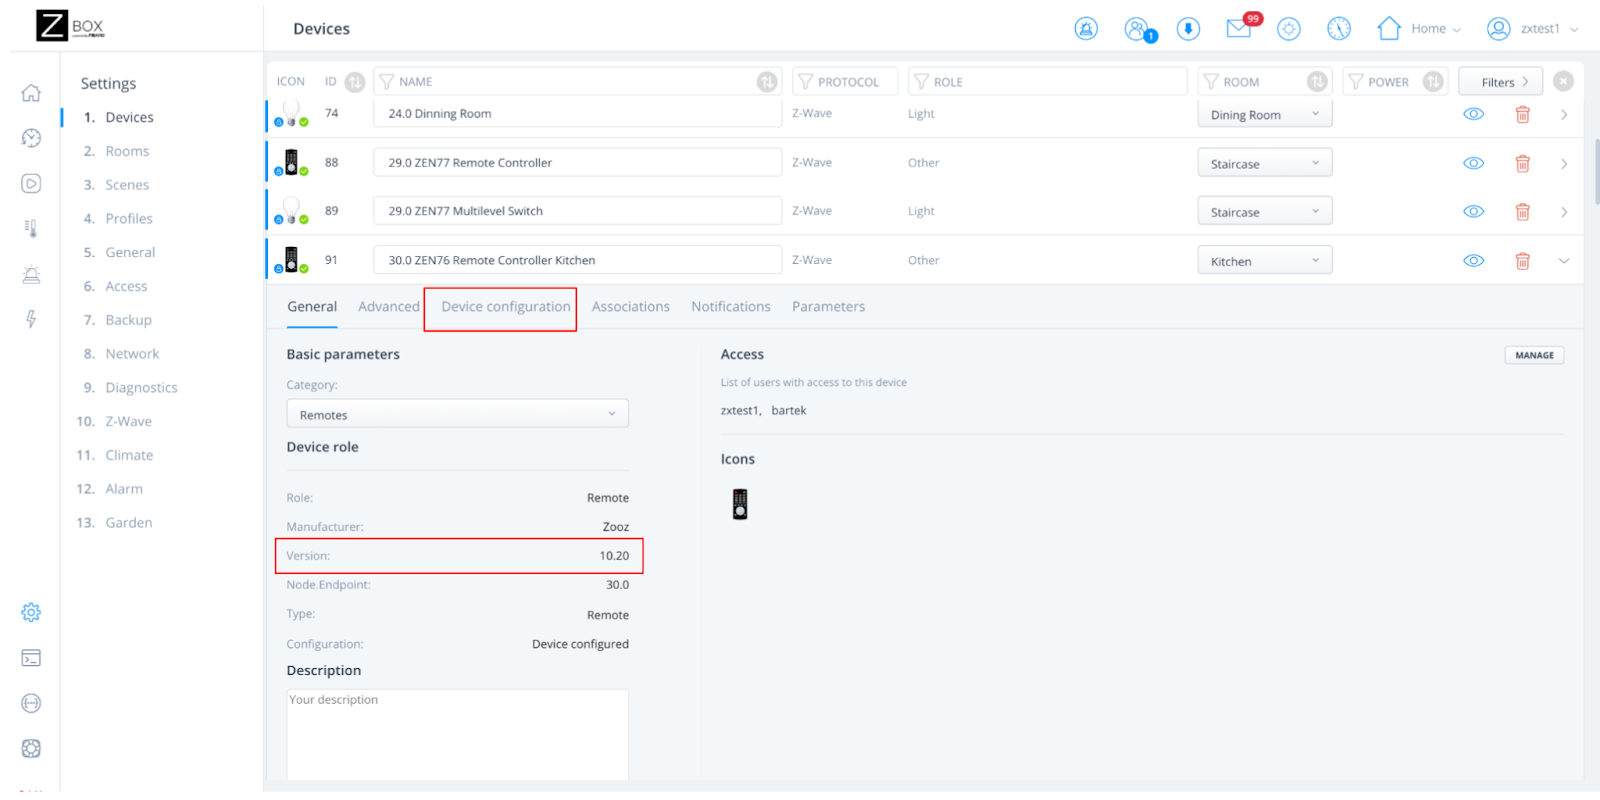
2. Click on the arrow next to the device you want to check to see device details.
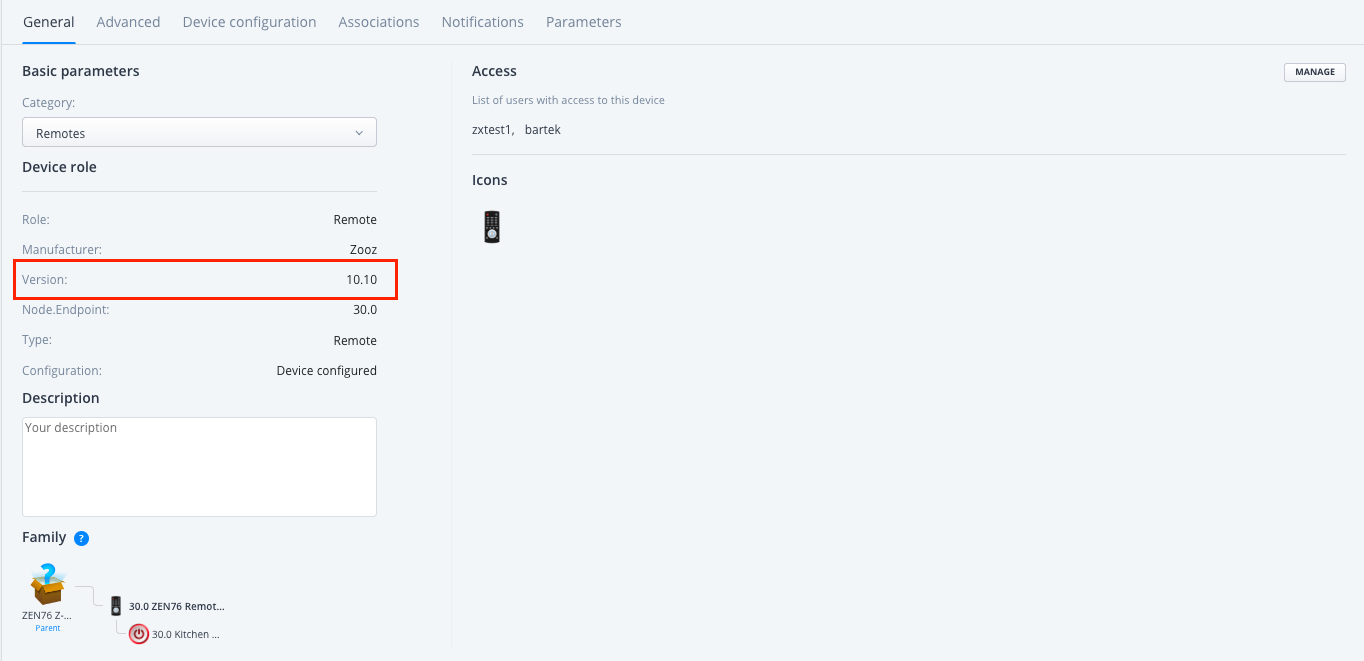
3. The current firmware version of the device is displayed on the General tab.
HOW TO PERFORM THE OTA UPDATE USING Z-BOX HUB:
Always ensure you have confirmed the current firmware version, and that you are updating to the correct firmware for your current hardware and firmware version. Devices bricked during firmware updates are not covered under warranty.
1. From the sidebar navigation menu of the Z-Box web interface, go to Settings by clicking on the gear icon.
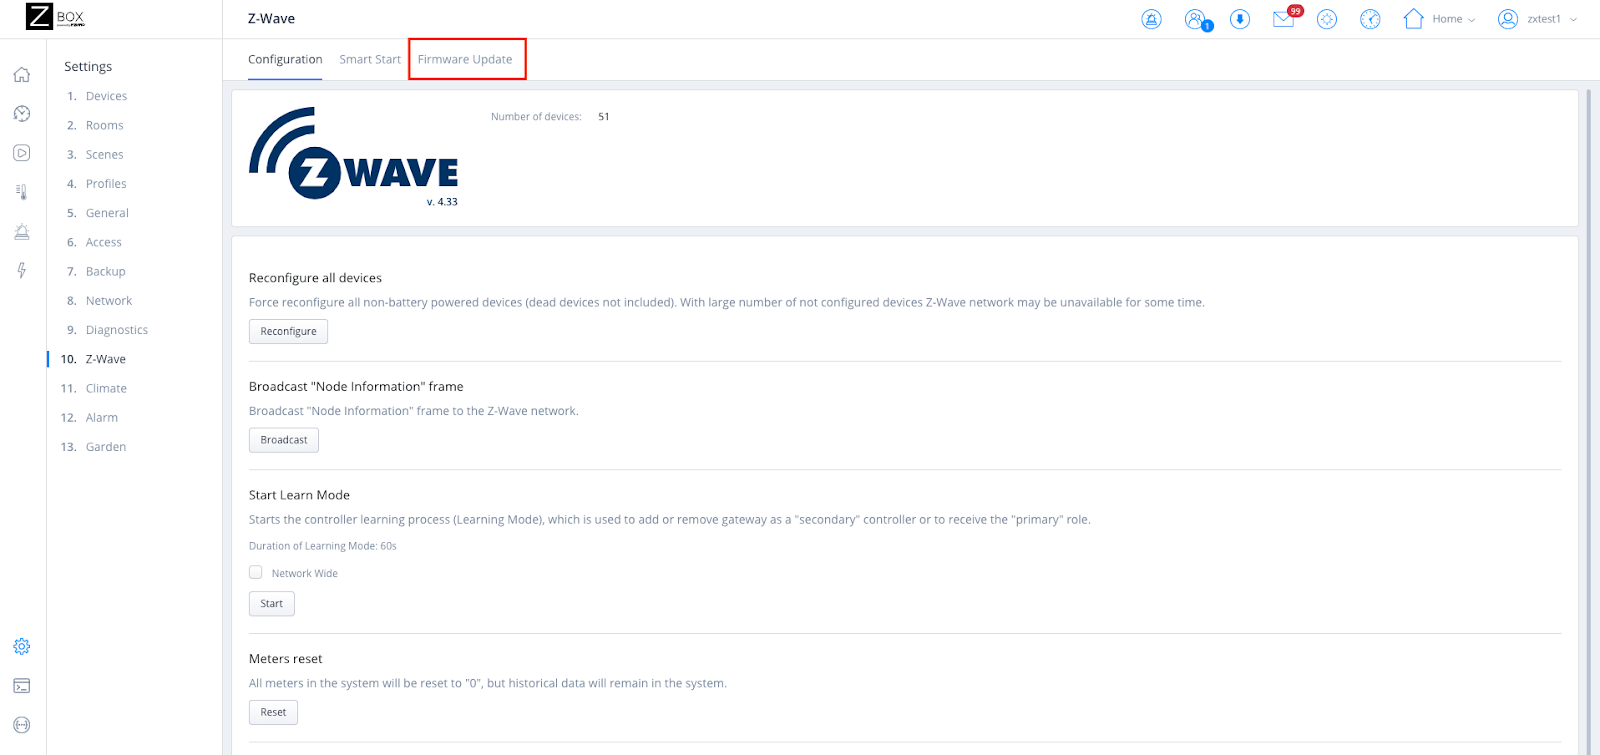
2. You will be redirected to the Devices menu. Click on the Z-Wave menu.
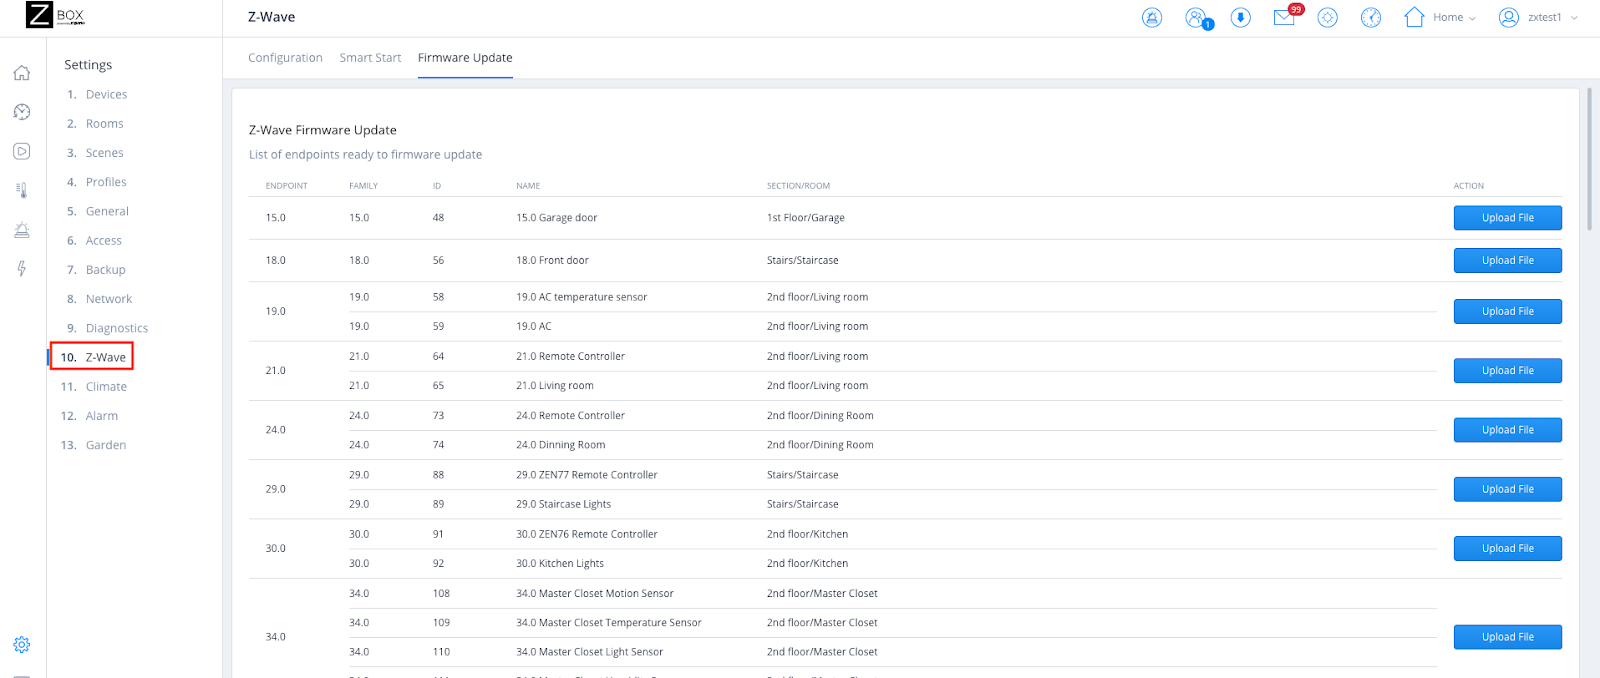
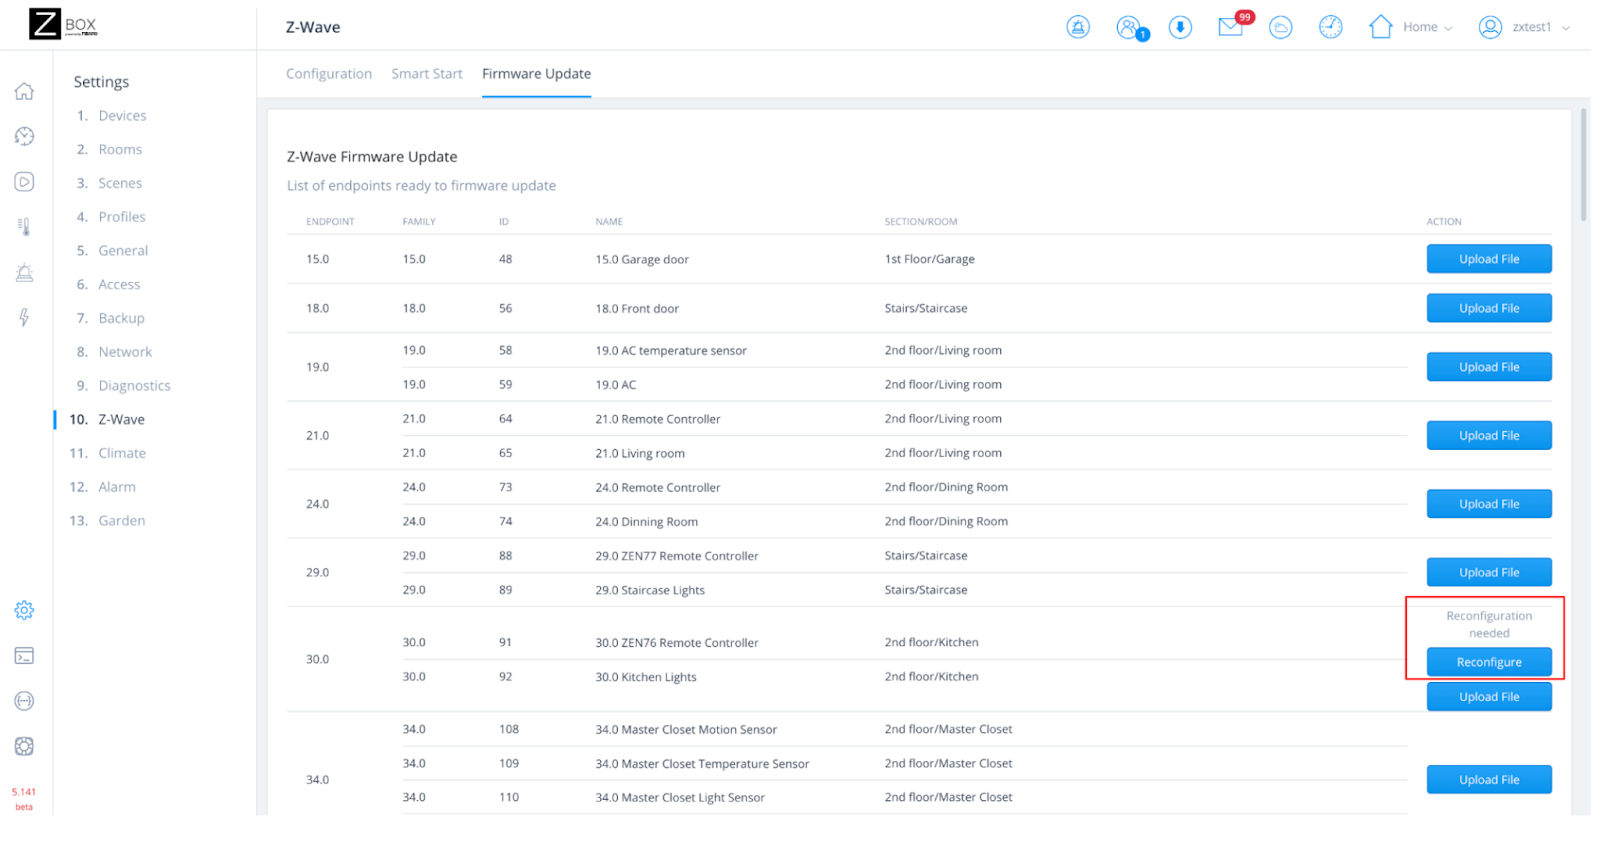
3. Click on the Firmware Update tab.
4. You will see the list of all the devices added to your Z-Box. Find the device you want to update the firmware for and obtain the firmware link from the device manufacturer. For Zooz Devices visit the Zooz OTA Firmware Files. Download the firmware link to your PC and unzip the file. 500 series device files will use the .otz or .hex format while 700 and 800 series device files will use the .gbl format.
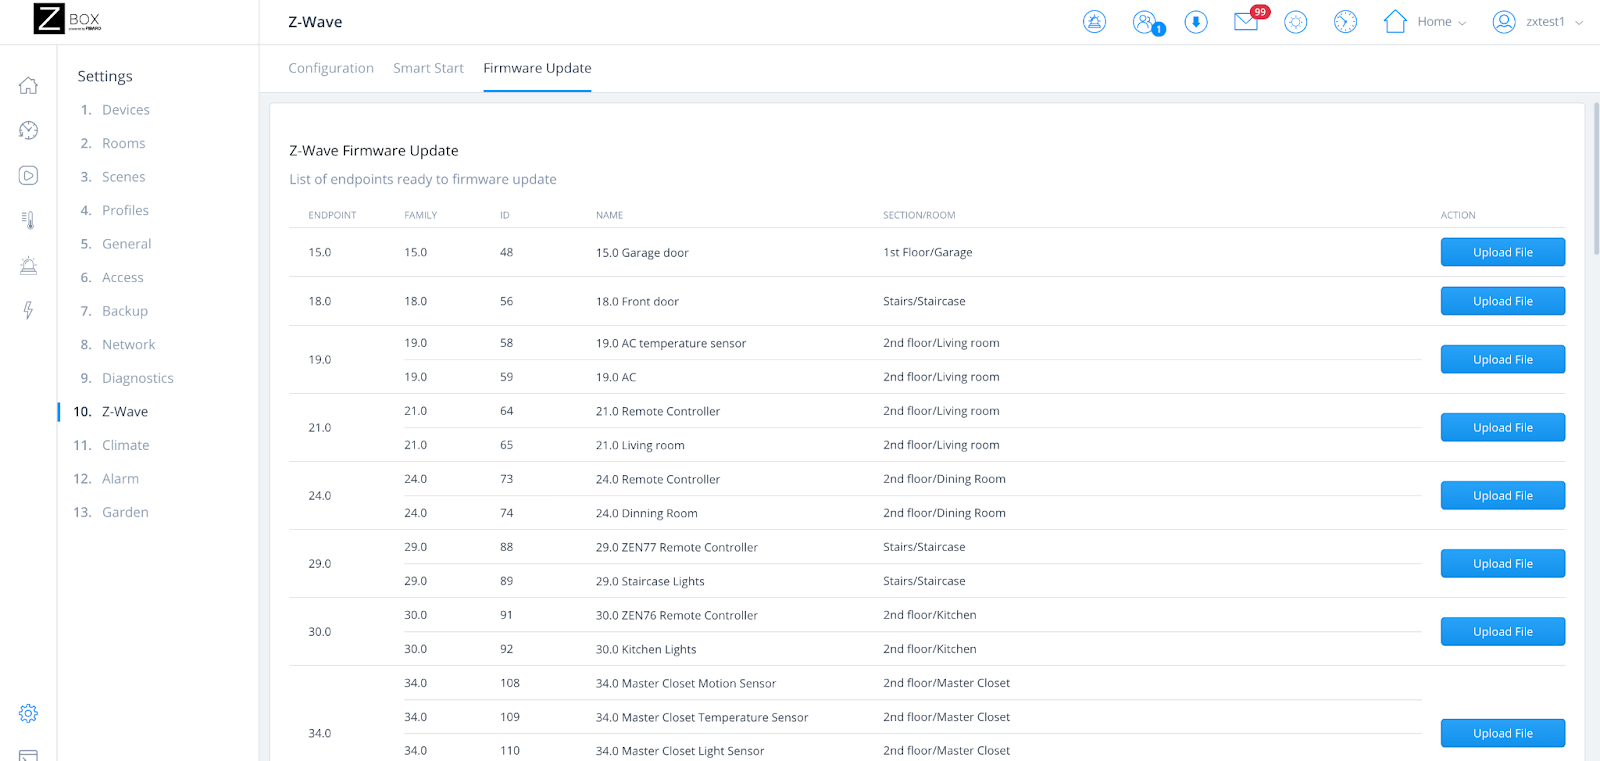
5. Once done click on Upload File.
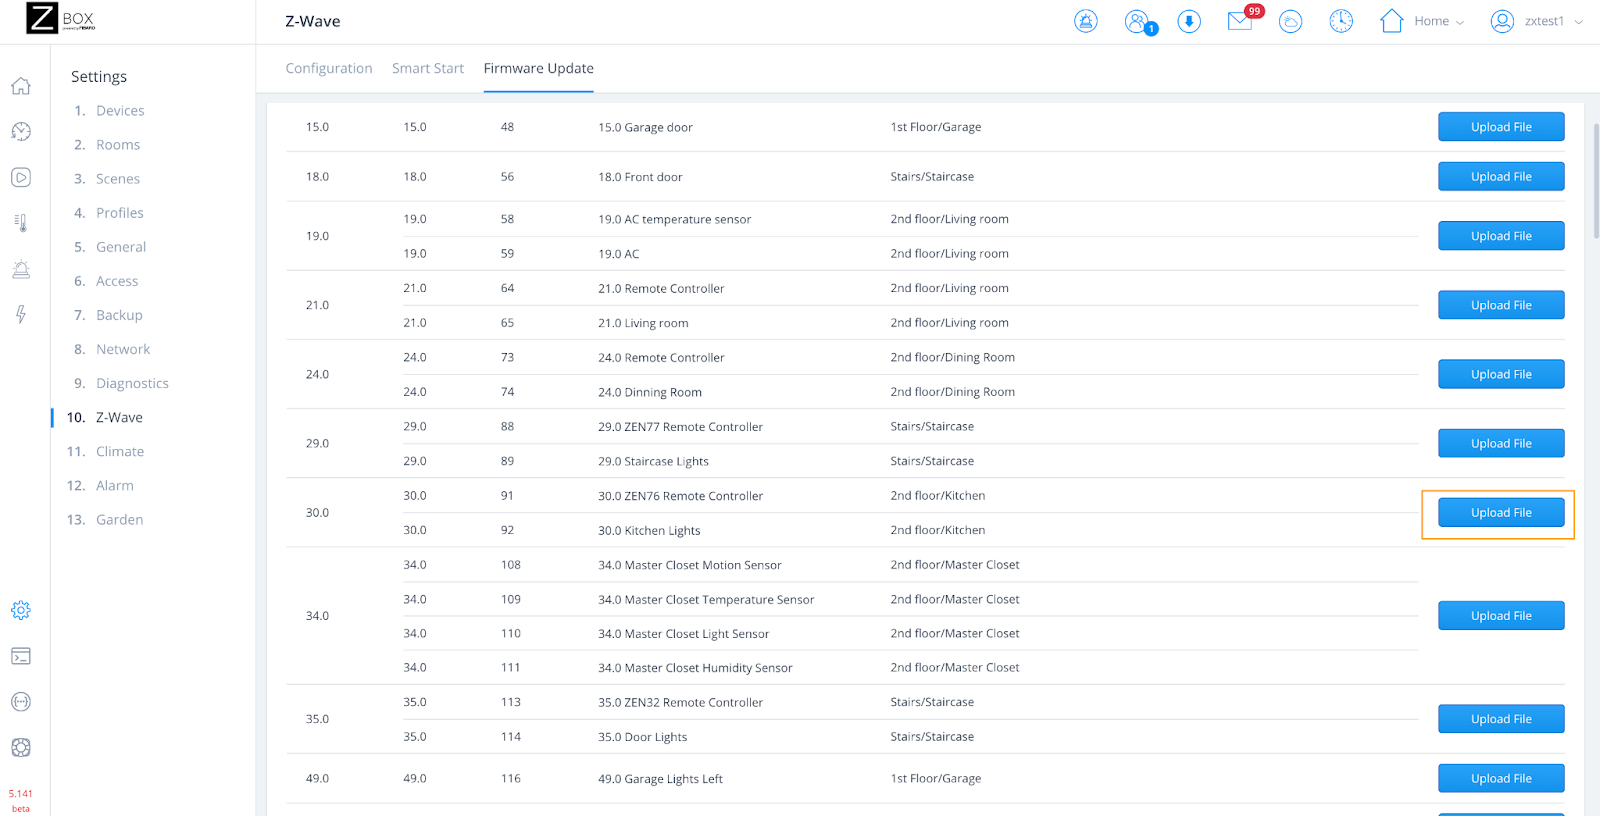
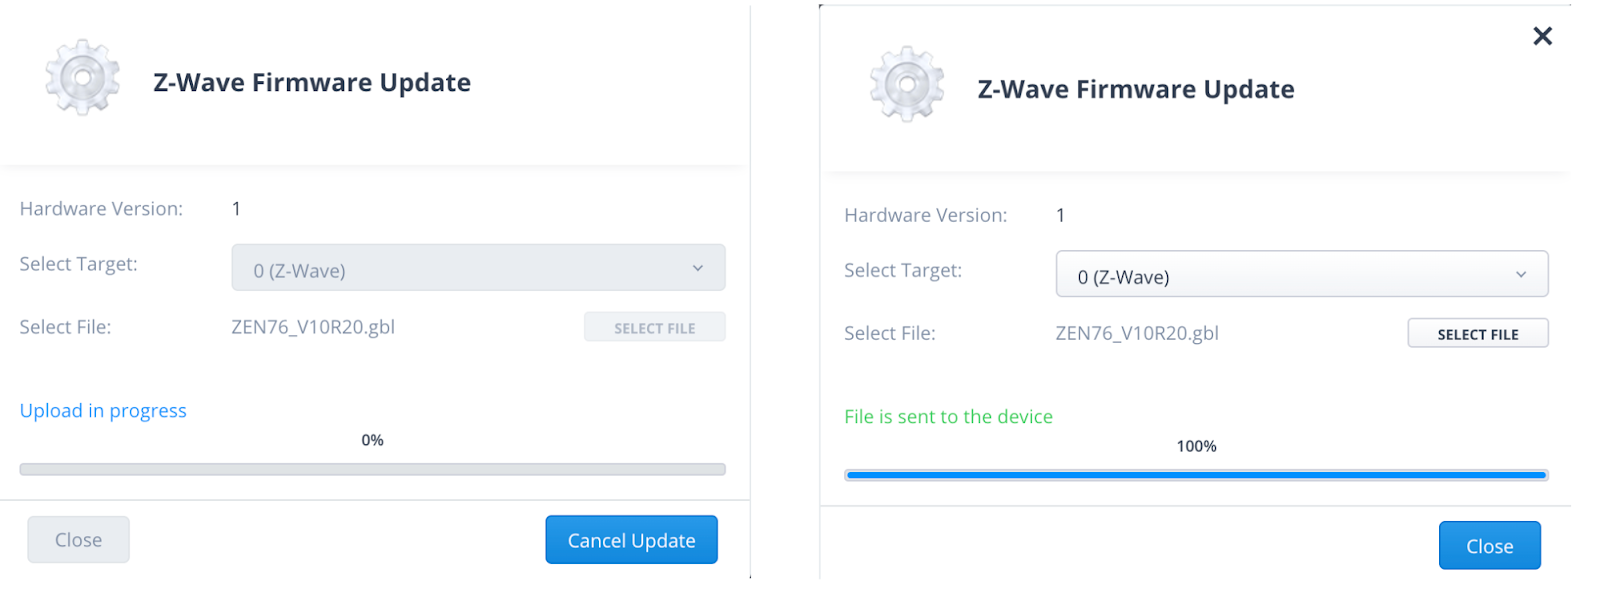
6. Provide all required information by selecting Target and the firmware file. Once done click on Start update to begin the update process.
7. The update process will start and can take up to a few minutes. Please note that the device or any automation using the device you are in process of updating might fail to respond to commands or run during the update process. Once the update reaches 100% and the message changes to File is sent to the device, click on the Close button to proceed.
RECONFIGURE THE DEVICE:
1. Click on Reconfigure to start the process.
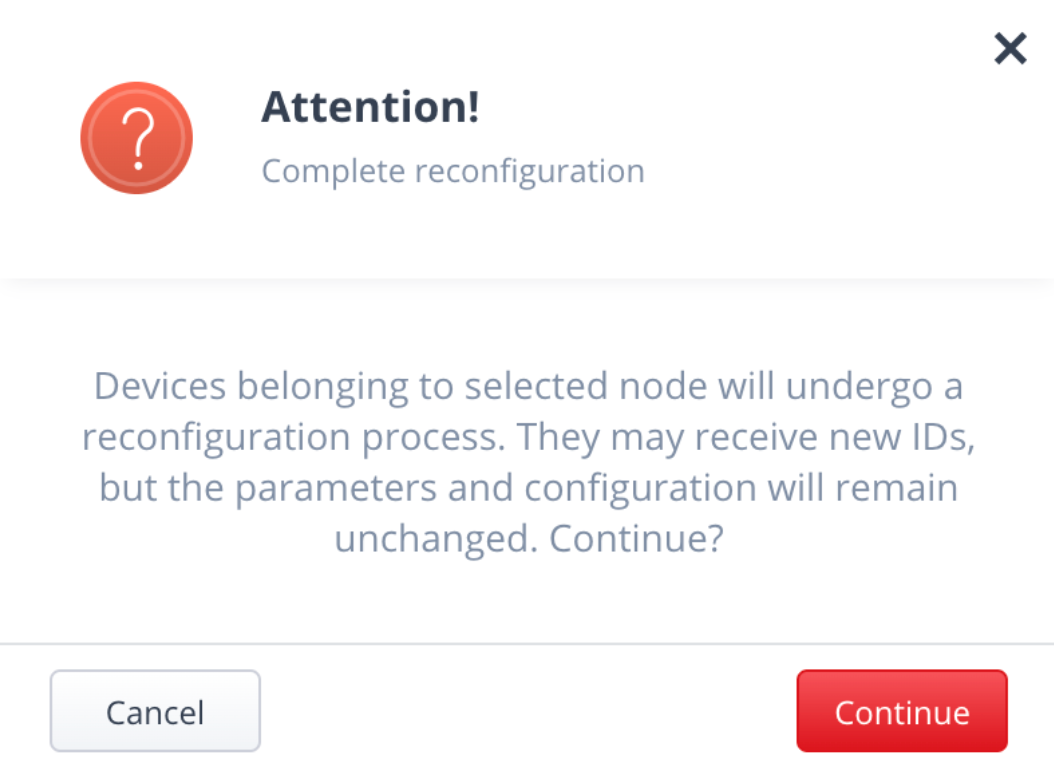
2. Click Continue to start the reconfiguration. It will only take a moment. After reconfiguration, the device ID might change. The device name will be changed as well as a part of reconfiguration. Your updated devices will remain in the scenes and automations you had programmed for them prior to the update.
Note: You might receive a reconfiguration failed error. Navigate to Settings/Devices and check the firmware version as shown at the beginning of this article. If the device shows the new firmware version, then the process was successful. If the device still has the old firmware version, please click on the Device configuration tab and then Reconfigure Device to retry the process.

Please let us know if you have any questions!

