
 3898
3898
Here is how you can create scenes to trigger a delayed action in the block scene building tool.
You can use any trigger to create your scene. For the below example we will use device base triggers and conditions:
- Single - trigger, condition, or action
- Group - action
Triggers will activate the scenes or it will check the rest of the conditions and triggers if present. Conditions will not activate the scene but they have to be met before the ‘do the following’ action gets executed.
The Z-Box Hub uses the basic logical designations to help you build advanced automations and rules. Here is what they mean:
== EQUALS
!= DOES NOT EQUAL
< LESS THAN
<= LESS OR EQUAL
> GREATER THAN
>= GREATER OR EQUAL
HOW TO CREATE A DEVICE-TRIGGERED SCENE WITH DELAYED ACTION:
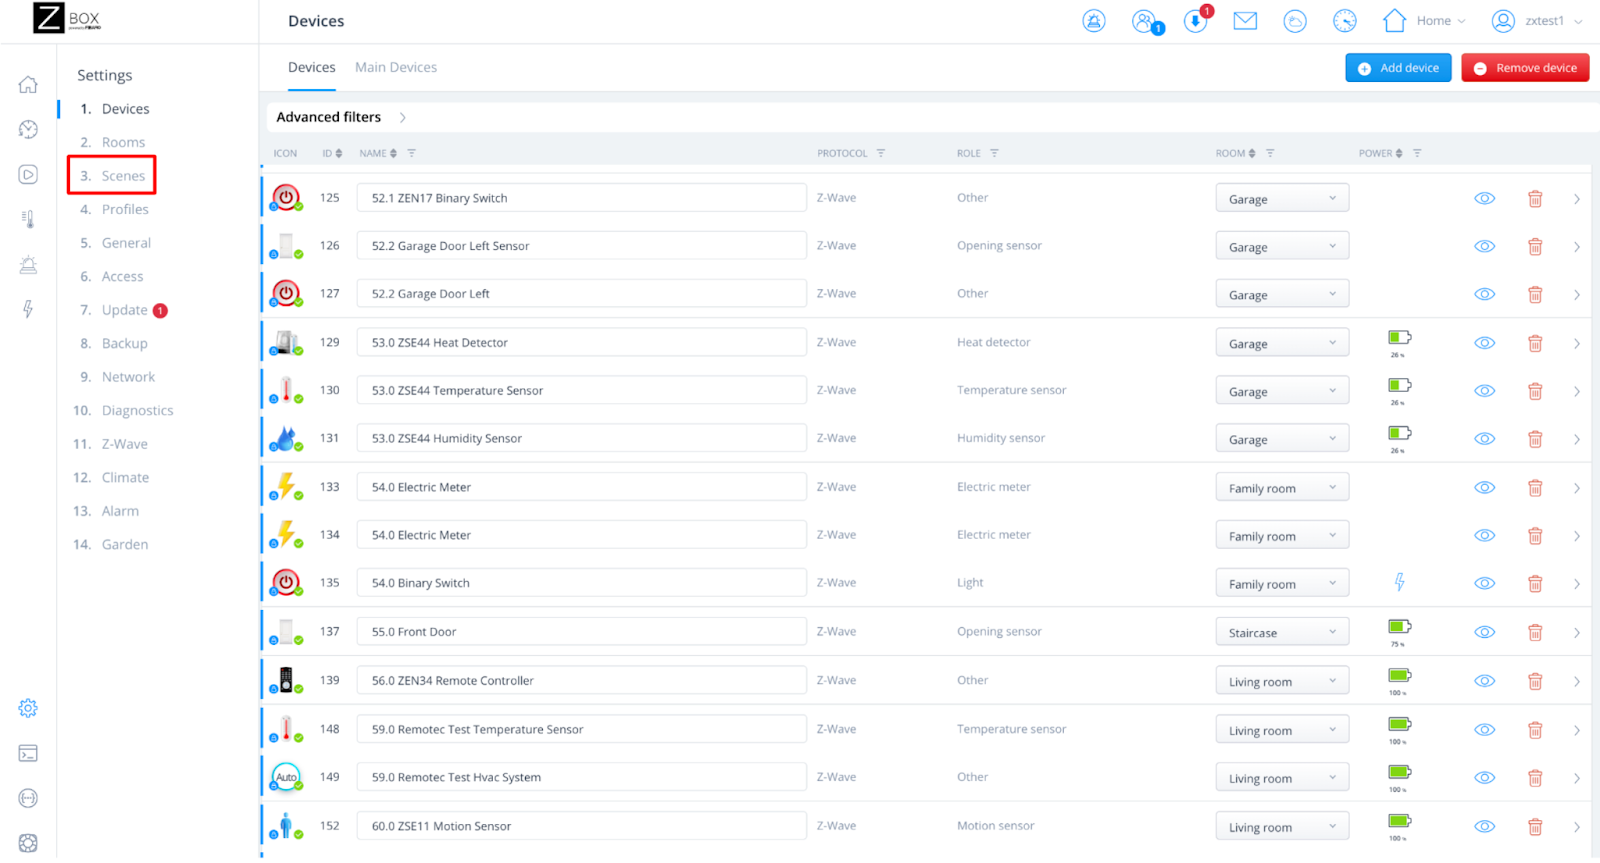
1. From the sidebar navigation menu of the Z-Box web interface, go to Settings by clicking on the gear icon.

2. Click on Scenes.
3. Click on Add Scene.
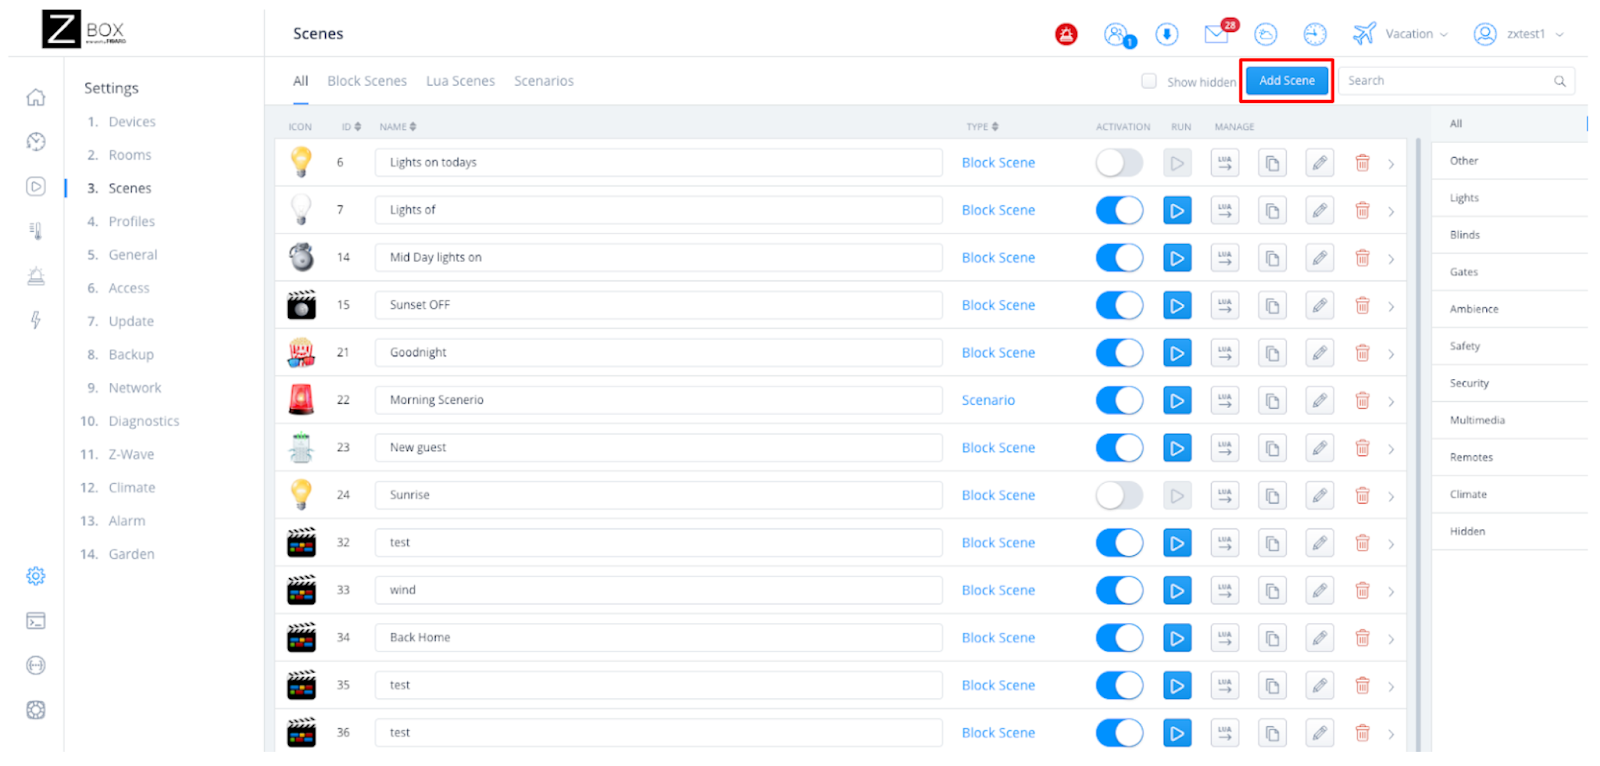
4. Select Block Scene.

5. Provide the scene information and click Save.


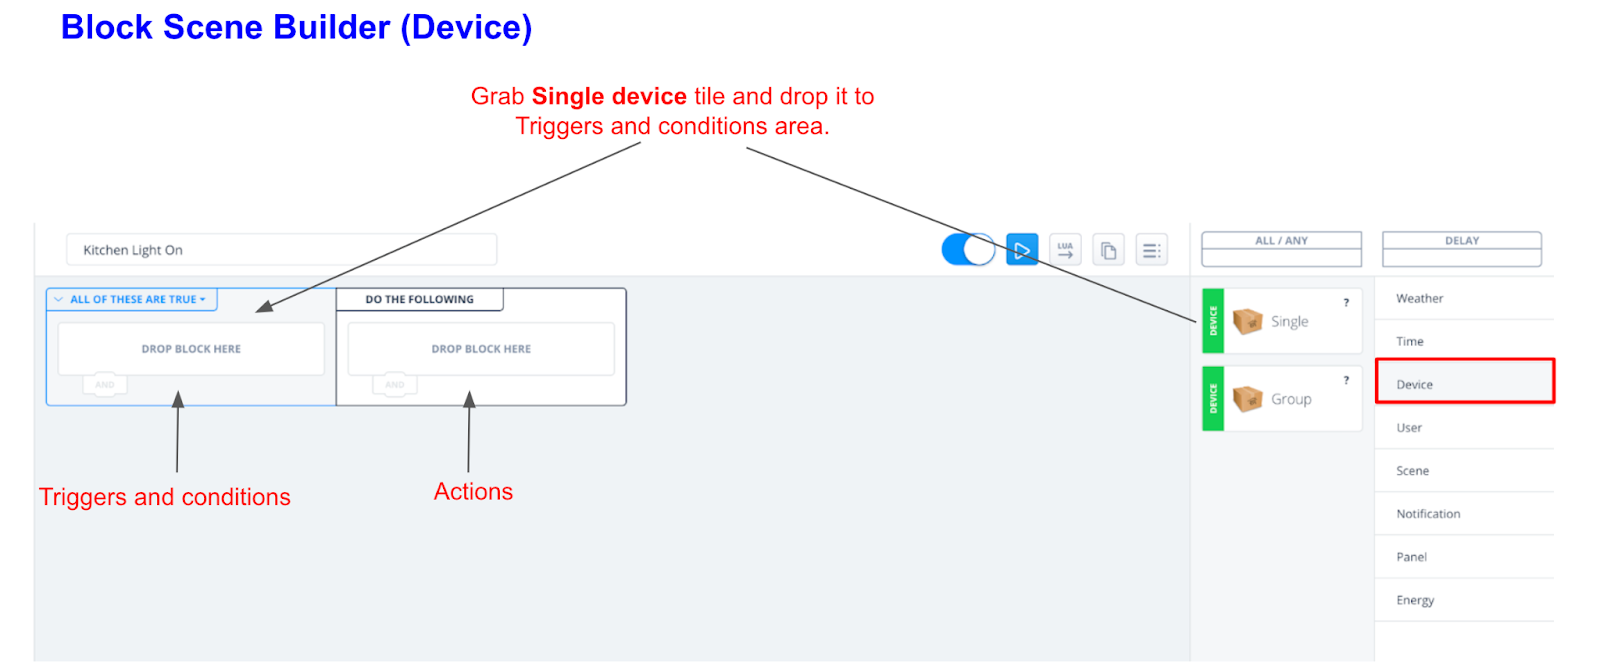
6. For device-triggered scenes, select Device on the trigger/action menu and drag and drop any of the available blocks to the Triggers and Condition section of the scene-building area.


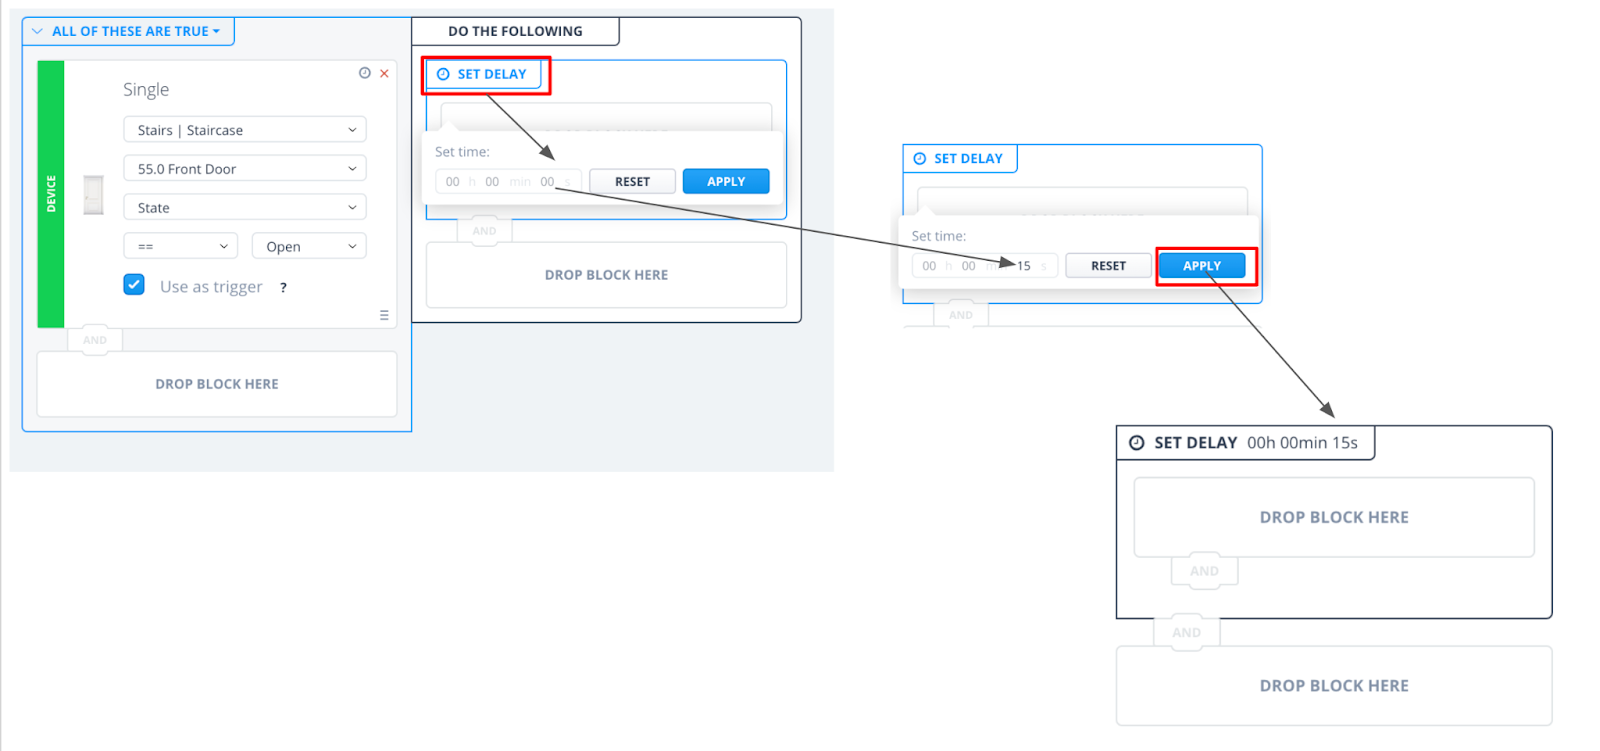
7. Once you specify the trigger and conditions, you will have to create the delayed action(s). Drag and drop the Delay tile to the Actions section.

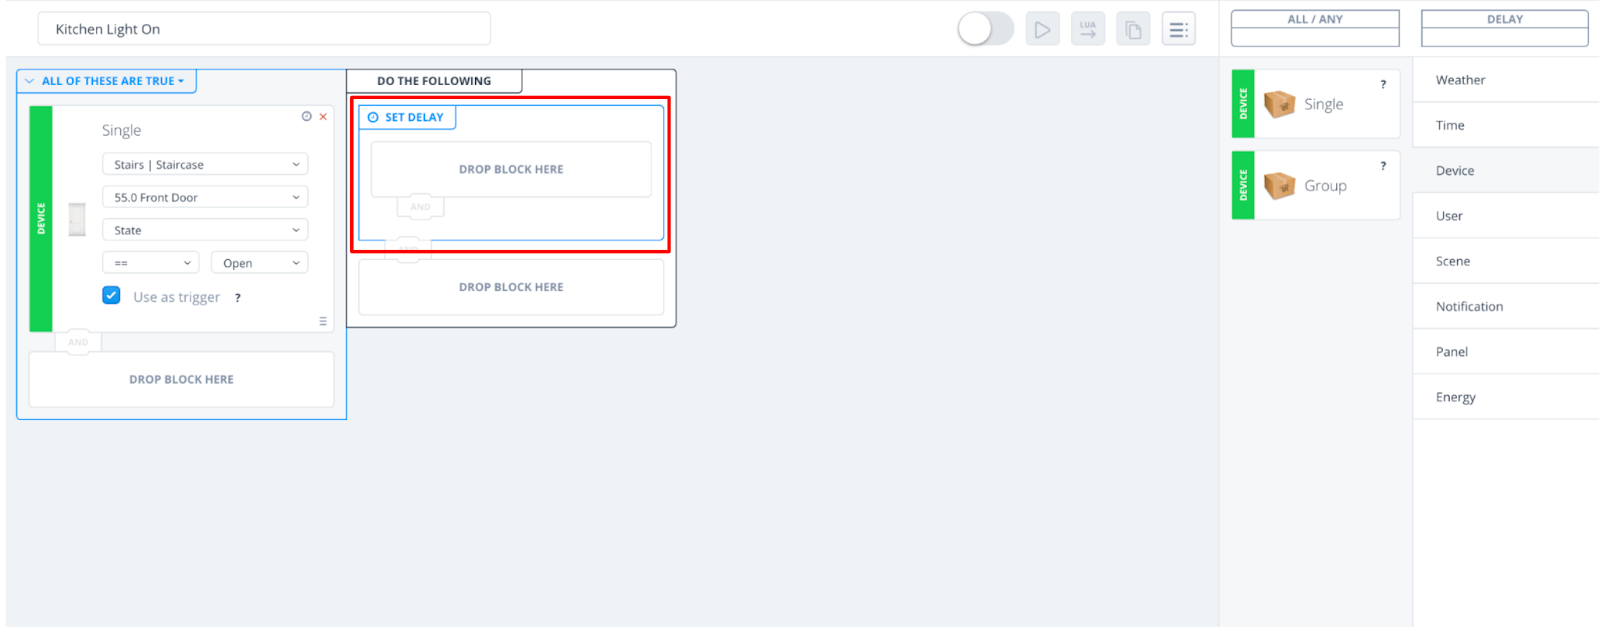
8. Next, set the delay. Click on Set Delay and enter the delay time in hours, minutes, or seconds. Once done, click Apply.
9. Now add the proper action by clicking and dragging the selected tile to the Delay area under the Action section.

10. Next, set the device behavior for your action. From here you can either save the scene, add more actions to this delay, or add an action with no delay or a different delay.


11. Click Save to save your scene.

SCENE EXAMPLES
Scene 1: Basic Device-triggered scene with a 15-second delay.
Trigger Type: Single Device
Trigger(s): When the Front door sensor status is set to open
Action(s): Turn on the Living Room Lights 15 seconds later
The scene will run: Every time the front door status is set to open

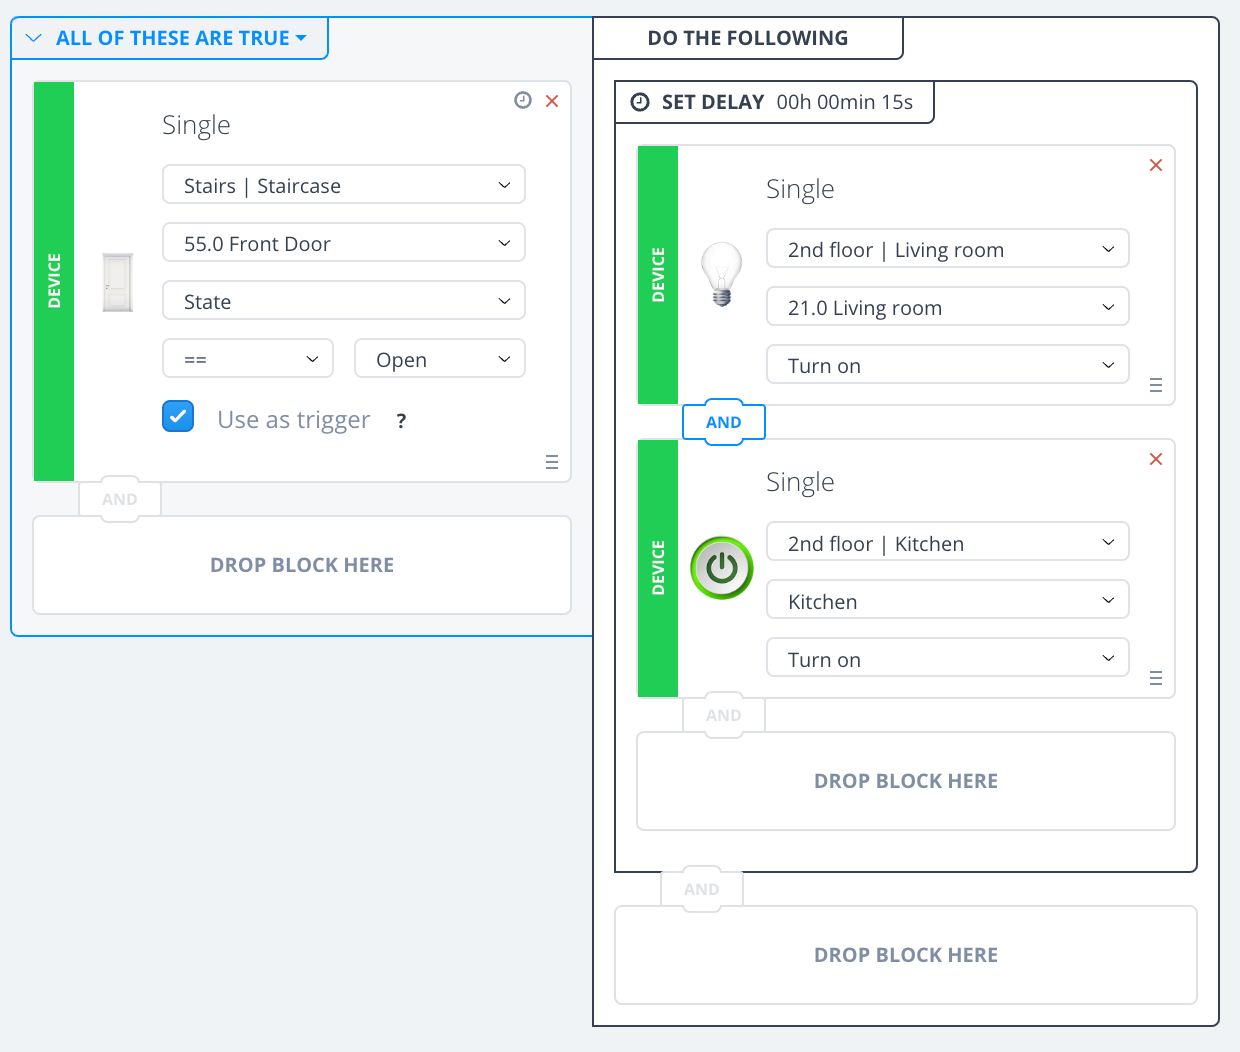
Scene 2: Basic Device-triggered scene with two delayed actions.
Trigger Type: Single Device
Trigger(s): When the Front door sensor status is set to open
Action(s): Turn on the Living Room and Kitchen Lights 15 seconds later
The scene will run: Every time the front door status is set to open
Scene 3: Basic Device-triggered scene with two actions, each with a different delay.
Trigger Type: Single Device
Trigger(s): When the Front door sensor status is set to open
Action(s): Turn on the Living Room Lights 15 seconds later and the Kitchen Lights 30 seconds later
The scene will run: Every time the front door status is set to open

Scene 4: Basic Device-triggered scene with two actions, one delayed and one immediate.
Trigger Type: Single Device
Trigger(s): When the Front door sensor status is set to open
Action(s): Send a push notification that "someone is home" right away and turn on the Living Room Lights 15 seconds later
The scene will run: Every time the front door status is set to open

If you're having issues programming your delayed scenes, feel free to reach out to our support team for help.

